


Warning: Cannot modify header information - headers already sent in /home/u278635817/domains/myhousegarden.com/public_html/wp-content/plugins/artigosgpt/artigosgpt.php on line 28454
Imagine waking to ripe, sun-warm tomatoes thriving without wasted water — that’s the promise of smart irrigation delivered through drip lines and moisture sensors. Smart irrigation turns scarce water into targeted hydration, ensuring each tomato plant gets exactly what it needs.
With drought pressure rising and water costs climbing, learning how to use drip lines and moisture sensors to water tomatoes efficiently and cut waste matters more than ever. This guide explains systems, placement, and simple strategies to save water and boost yield using smart irrigation.
Why smart irrigation transforms tomato care
Precision that protects plants
Smart irrigation focuses on roots, avoiding leaf wetting and disease. Drip tubing and emitters deliver steady moisture directly where tomato roots absorb it best.
Moisture sensors read soil conditions in real time, preventing overwatering and encouraging deeper root growth for resilient crops in changing climates.
Conservation and cost benefits
By reducing runoff and evaporation, smart irrigation cuts water waste and lowers bills. Timers and controllers optimize watering windows during cooler, low-evaporation hours.
Smart setups also reduce fertilizer loss and labor time, meaning healthier plants and more predictable harvests with less hands-on monitoring.
Core components: drip lines, emitters, sensors
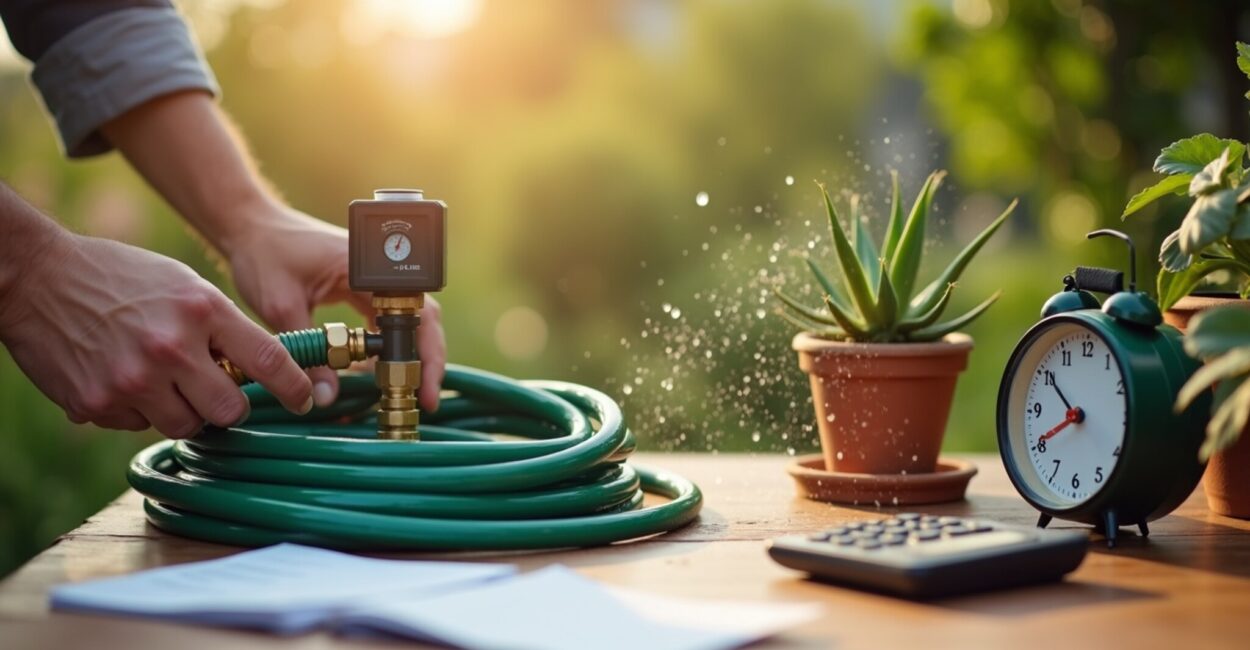
Drip line essentials
Drip lines come in pressure-compensating and non-compensating varieties. Choose based on slope and emitter spacing for even distribution along tomato rows.
Quality tubing resists clogging; filter screens and regular flushing keep emitters flowing for consistent plant hydration and reduced maintenance needs.
- Choose emitters of 0.5–2 GPH for tomatoes.
- Use pressure-compensating emitters on uneven terrain.
- Install in a grid for raised beds or parallel to rows.
Moisture sensors and controllers
Soil moisture sensors measure volumetric water content or tension. They feed controllers that trigger irrigation only when plants actually need water.
Wireless sensors simplify installation across beds, while smart controllers integrate weather forecasts to pause cycles during rain or extreme humidity.
Designing a tomato-focused smart irrigation layout
Mapping rows and emitter spacing
Map plant spacing and root zones before laying drip lines. Place emitters within the root radius to ensure even moisture distribution for established tomato plants.
Closer spacing benefits young transplants; wider spacing suits mature plants with larger root systems, reducing the number of emitters needed per plant.
Zoning and pressure planning
Create zones by plant type and sun exposure to tailor run times. Pressure regulators and manifold valves ensure each zone receives consistent flow and avoid emitter blowout.
Group tomatoes with similar water needs to maximize efficiency and prevent over- or under-watering adjacent crops with different requirements.
Installation and calibration: step-by-step setup
Site prep and drip line placement
Clear debris and lay lines before planting. Bury tubing shallowly or use mulch to protect against UV and retain soil moisture for tomatoes.
Secure tubing with stakes and test each emitter zone for leaks and uniform flow prior to planting to avoid mid-season surprises.
Sensor placement and calibration
Place moisture sensors at root depth near representative plants. Calibrate sensors to the soil type and crop stage for accurate thresholds that match tomato needs.
Perform a few test cycles and adjust setpoints to reflect local evaporation and rainfall patterns rather than default factory settings.
Operation: watering schedules and smart rules
Timing and frequency
Water deeply and infrequently to promote healthy root systems. Early morning watering minimizes evaporation and reduces disease risk for tomato foliage.
Use sensors to shift from rigid schedules to need-based watering; during fruit set, maintain slightly higher moisture for consistent fruit development.
Adaptive strategies and sensors integration
Integrate local weather data into your controller to suspend irrigation on cool, rainy days. Soil feedback plus forecast-based adjustments saves the most water.
Use sensor averaging across multiple probes to prevent false triggers from a single wet or dry spot, ensuring balanced irrigation across beds.
Maintenance, troubleshooting, and cost savings
Routine checks and winter care
Flush lines monthly, clean filters, and inspect emitters for blockages. Drain or winterize systems in freezing climates to protect tubing and valves.
Replace cracked tubing and test sensor batteries annually. Simple maintenance prevents uneven watering and preserves long-term savings.
Detecting problems quickly
Watch for dry patches, yellowing leaves, or soggy soil—each points to different issues like clogs, leaks, or incorrect sensor calibration.
Use a flow meter to spot hidden leaks. Fix small issues early to avoid plant stress and wasted water that undermines smart irrigation goals.
Performance comparison: expected water and yield gains
Quantifying savings and yield impact
Smart irrigation can cut water use by 30–60% versus overhead sprinklers while improving tomato yields and fruit quality through precise moisture control.
Beyond water savings, targeted irrigation reduces fungal disease and nutrient runoff, translating into healthier crops and lower input costs.
Practical results from trials
University extension trials often report higher soluble solids and firmer tomatoes under drip and sensor-managed regimes, improving marketability.
Local adaptation matters: soil type, climate, and cultivar behavior affect exact savings and yield improvements, so track results for your garden.
| Metric | Typical Overhead Sprinkler | Smart Drip + Sensors | Benefit |
|---|---|---|---|
| Water Use | 100% | 40–70% | 30–60% reduction |
| Tomato Yield | Baseline | +10–25% | Higher marketable fruit |
| Disease Incidence | Moderate–High | Low–Moderate | Reduced leaf disease |
- Plan zones by sun exposure and root depth.
- Install pressure-regulated drip tubing and filters.
- Place moisture sensors at representative root depth.
- Calibrate controller thresholds and run a test cycle.
- Monitor, adjust, and record results weekly.
Choosing products and trusted resources
How to pick reliable gear
Prioritize controllers with remote access, pressure compensation, and proven sensor compatibility. Read warranty terms and user reviews for build quality.
Buy filters rated for your water source and use UV-stabilized tubing for longevity. Balance upfront cost against expected water savings for payback timing.
Further learning and authoritative sources
Explore extension service guides for region-specific irrigation recommendations. University trials and government resources offer vetted best practices and data.
Useful references include the USDA Natural Resources Conservation Service and university extension publications for irrigation design and crop-specific advice.
External resources: USDA NRCS, EPA WaterSense, and local university extension pages like Extension.org.
Conclusion
Switching to smart irrigation with drip lines and moisture sensors transforms tomato growing from guesswork to precision care. You conserve water, cut costs, and harvest better tomatoes without constant oversight.
Return to the image of sun-warm tomatoes thriving with minimal waste — smart irrigation makes that achievable, practical, and repeatable for home gardeners and small farms alike.
FAQ
How often should I calibrate moisture sensors for tomatoes?
Calibrate moisture sensors at least twice per season: early growth and peak fruiting. Calibration accounts for soil texture and organic matter changes that affect readings. Check sensors after heavy rain, soil amendments, or cover crop incorporation. Recalibration ensures thresholds align with tomato root depth and current weather, avoiding over- or under-watering and protecting yield and fruit quality.
Can I retrofit an existing drip system with smart sensors and controllers?
Yes, most existing drip systems can be retrofitted by adding a smart controller and wireless or wired soil moisture sensors. Install a controller at the main valve or manifold, place sensors in representative zones, and configure setpoints. Ensure pressure regulation and filtration are adequate to protect emitters when integrating automation for reliable performance.
What sensor placement gives the most accurate soil moisture reading?
Place sensors at root-zone depth near representative plants, typically 4–8 inches for tomatoes. Avoid positioning directly adjacent to emitters or in persistently dry or wet microspots. Use multiple probes across a bed and average readings to reflect overall conditions, improving irrigation decisions and preventing misleading single-point data.
How does smart irrigation affect fertilizer management for tomatoes?
Smart irrigation reduces nutrient runoff by delivering water precisely, improving fertilizer uptake and timing. Drip systems paired with fertigation allow targeted nutrient delivery directly to roots, increasing efficiency. Monitor electrical conductivity or run periodic soil tests to align fertigation rates with plant needs, minimizing waste and enhancing fruit quality.
What is the typical payback period for investing in smart irrigation?
Payback varies by water cost, system size, and crop value but often falls between 1–4 years for small farms and serious home growers. Savings come from reduced water use, lower labor, and higher yields. Factor in maintenance, device lifespan, and local incentives or rebates for irrigation upgrades when calculating return on investment.


