


Warning: Cannot modify header information - headers already sent in /home/u278635817/domains/myhousegarden.com/public_html/wp-content/plugins/artigosgpt/artigosgpt.php on line 28454
Gravel Landscaping is a practical, low-maintenance option for many homeowners looking to reduce water use and maintenance. It replaces grass with durable aggregate that controls erosion, improves drainage, and offers a versatile aesthetic. Gravel landscaping matters because it lowers upkeep, can cut irrigation costs, and adapts to a range of climates.
Homeowners face choices about layout, materials, and local codes when switching to gravel yards. Understanding drainage, weed barriers, and plant selection helps avoid common pitfalls like poor grading or excessive heat retention. This article explains benefits, ideal layouts, and mistakes to avoid so you can decide if gravel landscaping suits your property and climate.
Below we walk through practical design options, installation steps, cost comparisons, and seasonal care to help you plan a successful gravel landscape. You’ll find checklists, comparative tables, and resources from authoritative sources to guide decisions and next steps.
Gravel Landscaping Basics and Benefits
What Gravel Landscaping is and Why It Helps
Gravel landscaping replaces or accents turf and planted areas with small stones or crushed rock to reduce maintenance and water needs. It simplifies irrigation because it doesn’t require regular mowing, fertilizing, or extensive watering, lowering both time and utility costs. Many homeowners choose gravel landscaping to create durable pathways, patios, and modern xeriscape designs that suit arid climates and conserve resources.
Beyond water savings, gravel surfaces improve surface drainage when installed with proper grading and base layers. That helps prevent erosion and standing water around foundations. Gravel also resists compaction and can be selected in colors and textures that complement hardscaping and native plantings.
Done correctly, gravel landscaping becomes an aesthetic feature and functional groundcover—supporting garden beds, decorative borders, and permeable driveways. Consider local climate and soil type to match stone size, underlayment, and plant choices for long-term success.
Environmental and Cost Advantages
Gravel landscaping offers environmental benefits such as reduced water consumption and fewer chemical inputs from fertilizers and pesticides. Less mowing means fewer emissions from gas-powered equipment and a smaller carbon footprint. It also increases permeability, feeding rain into the soil and aquifers when designed with pervious layers.
From a cost perspective, initial installation can be comparable or lower than establishing and maintaining a turf lawn over several years. Long-term savings come from reduced irrigation, labor, and maintenance materials. Evaluate local material costs, delivery, and any excavation required to estimate true budgets.
Green-minded homeowners often combine gravel with native plantings and rain-harvesting elements to maximize sustainability. Check local incentives for water-wise landscaping—municipal programs sometimes offer rebates or guidance on drought-resistant yard conversions.
Common Use Cases for Gravel Yards
Gravel landscaping works well for pathways, driveways, patios, plant mulches, and decorative groundcover. It’s commonly used in xeriscapes, modern minimalist gardens, and as a backdrop for succulents and Mediterranean plant palettes. Gravel also functions as a low-cost solution for large areas where turf is impractical or water-prohibitive.
For high-traffic zones, select angular crushed stone that locks together better and limits displacement. For decorative beds, round pea gravel provides a softer appearance but may shift more easily. Combining gravel with stepping stones, concrete pavers, or decomposed granite creates varied textures and functional surfaces.
In rainy climates, gravel beds installed with proper drainage layers prevent pooling and channel runoff to planted swales or rain gardens. Tailoring rock size and underlayment ensures the landscape remains attractive and functional year-round.
Designing a Gravel Landscape Layout
Planning Site Layout and Grading
Careful planning of grade and slope is essential for stable, long-lasting gravel landscaping. Begin by identifying high-traffic routes, drainage flow, and existing utilities to avoid surprises during installation. A gentle slope away from structures directs water safely to drainage points and prevents pooling near foundations.
Hard edges like metal or stone edging help contain gravel and define beds. They also make mowing around borders easier and keep pathways tidy. Combine edging with compacted base layers to stabilize the surface and prevent migration into planting areas.
Consider how the gravel will interface with patios, walkways, and planting zones. Use permeable transitions where needed to maintain infiltration and reduce runoff. A simple site plan and grading sketch guide contractors and DIY installers during excavation and base preparation.
Materials and Finishes for Visual Impact
Select gravel types—pea gravel, crushed rock, river rock, or decomposed granite—based on texture, color, and functional needs. Color choices can warm or cool a landscape palette; lighter stones reflect heat while darker aggregates absorb warmth. Mix sizes strategically: finer top layers over a crushed-rock base provide stability and finished appearance.
Accent materials like boulders, stepping stones, and mulch create focal points and break up large expanses. Native stones and local aggregates often blend more naturally with regional landscapes and can be cost-effective due to reduced transport expenses.
Integrate planting pockets and drip irrigation to soften the hardscape and support drought-tolerant perennials. The right combination of gravel and plantings can turn a maintenance-saving groundcover into an attractive, livable outdoor space.
Practical Layout Examples and Templates
Common layouts include gravel driveways with paver borders, courtyard patios with seating areas, and gravel mulch beds around succulents and shrubs. For pathways, choose a width that accommodates intended traffic and consider curves to slow movement and create interest. Straight lines read formal; curves feel relaxed and natural.
Modular layouts using repeating shapes—squares, circles, or linear bands—create cohesion across a yard. Pair gravel strips with permeable pavers for a combined functional/aesthetic approach. Use diagrams or garden design tools to visualize how the stone interacts with lighting and plant heights.
When planning, remember maintenance access, drainage needs, and seasonal changes. A well-thought-out template will minimize rework and help estimate material quantities accurately before ordering supplies.
Installation Steps for Gravel Landscaping
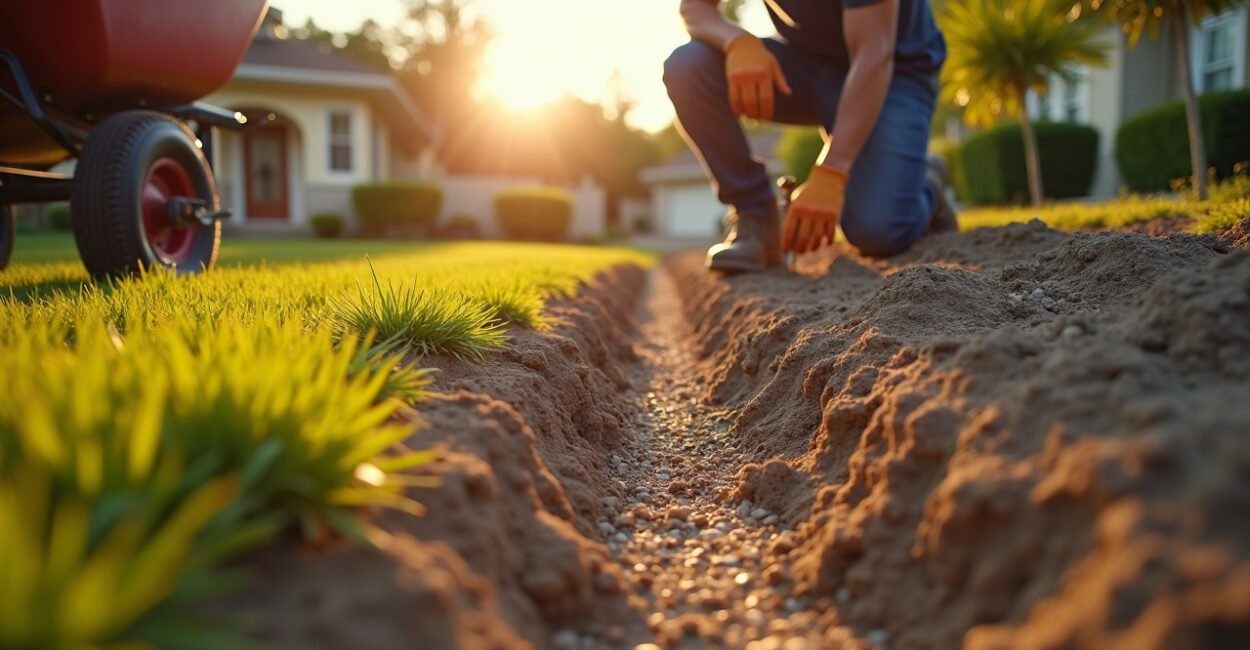
Site Preparation and Excavation
Start by clearing vegetation, roots, and debris from the area to create a clean base for gravel installation. Excavate to the required depth—typically 4–8 inches depending on intended use—allowing room for a compacted subbase and top gravel layer. Remove topsoil where drainage is poor and reshape the grade to direct water away from structures.
Install a landscape fabric or geotextile to suppress weeds and separate the subbase from the top layer; choose a permeable fabric to maintain infiltration. Compact the subgrade with a plate compactor for a stable foundation, especially under driveways or high-traffic paths.
Mark edges and install edging materials early to define limits. Proper preparation reduces future maintenance and prevents gravel migration. If unsure, a professional excavation contractor can confirm grades and subbase compaction standards before continuing.
- Measure and mark area accurately
- Remove sod and organic topsoil
- Grade to direct drainage away from buildings
- Install permeable landscape fabric and compact subgrade
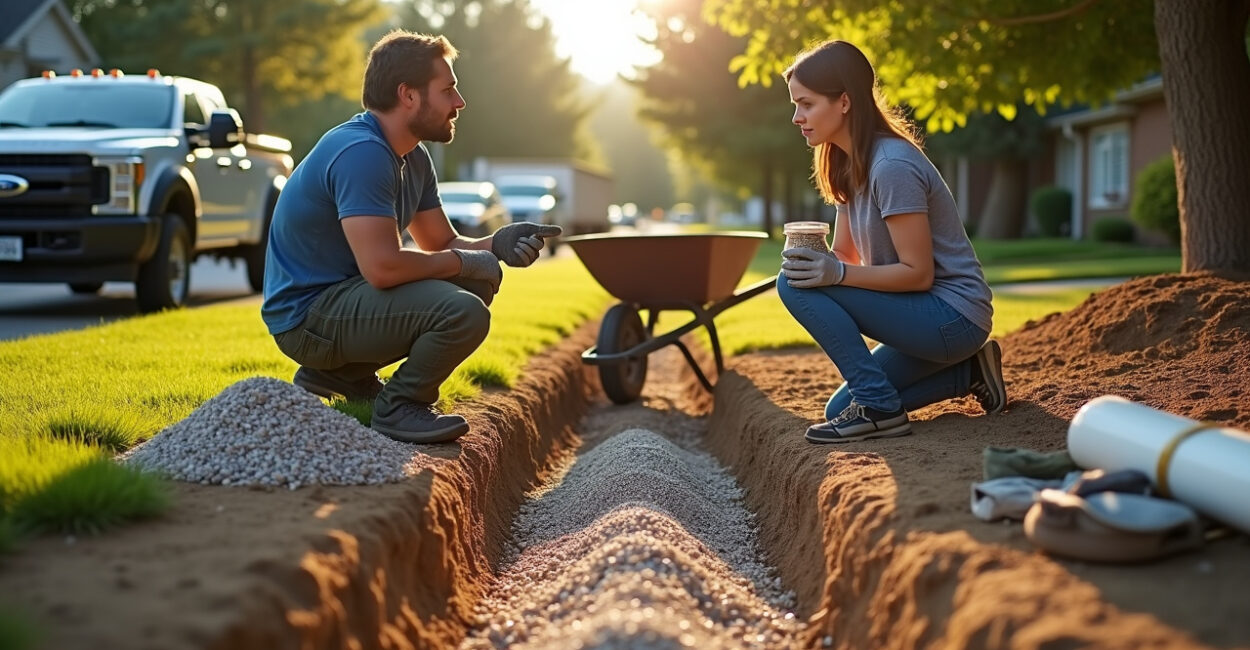
Choosing Base Layers and Compaction
Successful gravel landscaping depends on a stable base: crushed stone or road base provides structure and drainage beneath the decorative top layer. Spread and compact a 2–4 inch base layer with a plate compactor for walkways, and 4–6 inches for driveways. Proper compaction reduces settling and washout risks.
Consider a layered approach: larger crushed rock for the initial base, finer crushed stone for the binder, then the decorative aggregate. Each layer needs compaction and grading to achieve a firm, uniform surface. Edge restraints help maintain layer integrity and prevent sideways migration.
Drainage considerations may require perforated pipes or French drains beneath the base. In areas with freeze-thaw cycles, deeper bases and better compaction reduce frost heave—speak with local installers to match regional requirements.
Top Dressing, Edging, and Finishing Touches
Once the base is compacted, spread the top dressing gravel evenly and rake to desired depth—typically 1–2 inches for decorative beds and 2–3 inches for pathways. Compact lightly if using angular material to lock particles together; avoid over-compacting decorative rounded stones which may shift.
Install edging to secure the gravel and define clean lines against lawn, beds, or pavers. Add landscape lighting, stepping stones, or groundcover plantings to create functional and aesthetic variety. Mulch-free planting zones should include domed soil mounds and drip irrigation to protect roots from direct contact with stone.
Perform a final sweep to remove stray stones from hard surfaces and test runoff during a heavy water event if possible. Regular visual checks and periodic top-ups maintain appearance and function over time.
Choosing Plants and Hardscape with Gravel
Selecting Plants for Gravel Landscapes
Choose drought-tolerant, low-maintenance plants that thrive in well-drained soils—succulents, Mediterranean herbs, ornamental grasses, and native shrubs are excellent picks. These species tolerate heat and limited water, integrate naturally with gravel beds, and require minimal soil amendments.
When planting, use raised planting pockets or islands to give roots organic material away from constant stone contact. Add a layer of mulch or soil around roots and install drip irrigation for targeted watering. Group plants by water needs to avoid over- or under-watering sections of the landscape.
Consider seasonal interest—evergreens for structure, flowering perennials for color, and textured grasses to soften rock surfaces. Proper plant selection and placement enhance biodiversity and help keep the gravel landscape visually appealing year-round.
Hardscape Elements That Pair Well with Gravel
Pavers, concrete slabs, boulders, and timber edges complement gravel areas while providing functional surfaces for seating and activities. Permeable pavers allow water infiltration and maintain the environmental benefits of gravel landscaping. Stepping stones reduce drift and create clear pathways through beds.
Retaining walls or low borders can create terraced gravel gardens on slopes, improving drainage and visual depth. Built-in seating and fire pits set on compacted bases provide livable outdoor rooms that blend with the gravel aesthetic.
Match materials to style: smooth bluestone or corten steel for modern looks, reclaimed timber and natural boulder for rustic designs. Thoughtful hardscape choices lift the overall design and improve usability.
Maintenance Plans for Planted Gravel Areas
Maintenance focuses on weed control, periodic top-ups of gravel, and seasonal plant care. Weed emergence can be minimized by quality geotextiles, pre-emergent herbicides where allowed, and hand-pulling small patches promptly. Inspect edging and repair displaced stones after heavy rain or foot traffic.
Irrigation should be targeted—drip systems reduce evaporation and benefit root zones without wetting the gravel surface. Prune and divide perennials as needed and replenish mulch or soil in planting pockets to sustain plant health.
Schedule annual inspections to assess compaction, erosion, and drainage. A light rake and spot replacement of stone keeps the landscape tidy and functional with minimal effort.
Costs, Materials, and Comparisons
Cost Breakdown and Budgeting for Gravel Yards
Costs vary by material choice, site prep needs, and whether you DIY or hire contractors. Expect to budget for excavation, base materials, landscape fabric, edging, gravel, and any drainage improvements. Driveways and high-use areas require thicker bases and higher material costs than decorative beds.
Labor can be significant for excavation and compaction; contracting professionals ensures proper grading and longevity. Request multiple quotes and check references. Buying materials in bulk or choosing locally sourced stone reduces delivery expenses.
Consider lifecycle costs: lower irrigation and maintenance expenses often offset initial installation. Calculate payback by comparing current lawn upkeep and water bills with projected gravel landscape costs over several years.
| Area Type | Typical Depth | Estimated Cost/ft² |
|---|---|---|
| Decorative bed | 2–3 in | $1–$3 |
| Pathway | 3–4 in | $2–$6 |
| Driveway | 6–8 in | $5–$12 |
Comparing Gravel to Turf and Other Mulches
Compared to turf, gravel requires much less water and routine care, but offers less cooling and recreational surface for kids. Organic mulches enrich soil while decomposing; gravel does not, so plants may need supplemental soil amendments. Gravel is more permanent and suited for low-maintenance zones.
Decomposed granite creates a compact, natural walking surface closer to compacted soil, while pea gravel provides decorative appeal. Choose based on intended use: play areas favor softer surfaces, while seating and driveways need stability and compaction.
Evaluate local climate: cool, wet regions may favor turf for cooling and play, while arid regions benefit most from gravel landscaping’s water savings and resilience.
Material Sourcing and Sustainability Considerations
Source stone locally when possible to reduce transport emissions and support regional aesthetics. Recycled aggregates and reclaimed crushed concrete can be sustainable, but confirm contaminants and suitability for landscaping. Verify quarry practices if sustainability certifications matter for your project.
Consider the embodied energy of paving and edging materials and choose permeable options to maintain groundwater recharge. Use native plants and efficient irrigation to maximize environmental benefits and potentially qualify for local conservation incentives.
Check municipal regulations and HOA rules before converting large lawn areas; some jurisdictions offer rebates for xeriscaping, while others have strict aesthetic guidelines. Plan with both sustainability and compliance in mind.
Potential Problems and How to Avoid Them
Common Installation Mistakes and Fixes
Poor grading, inadequate base compaction, and skipping geotextile are frequent errors that lead to sinking, uneven surfaces, or weed problems. Fixes include regrading trouble spots, adding or re-compacting base material, and installing proper edging to stop migration. Address erosion paths by adding drains or swales.
Choosing the wrong stone size or material for the intended use results in constant displacement; swap to angular crushed stone for stability in high-traffic areas. If drainage is insufficient, install perforated drains or improve slope away from structures.
For persistent weed issues, remove contaminated top layers, apply a suitable pre-emergent, and replace with clean aggregate and fabric. Regular spot maintenance prevents small problems from becoming major repairs.
- Ensure proper grading before installation
- Use a compacted crushed-stone base for stability
- Install durable edging to contain material
- Address drainage proactively to prevent washouts
Weed Control and Pest Management
Weeds can still emerge through fabric seams or from seeds blown in. Use woven geotextiles rated for weed suppression, overlap seams adequately, and secure edges. Apply targeted pre-emergent herbicides where permitted or rely on manual removal for small patches to avoid broad chemical use.
Gravel can attract ants or other insects nesting beneath stones; maintaining a clean planting interface and removing excessive organic material reduces harborage. Encourage beneficial predators by integrating native plants and avoiding blanket insecticide use.
For rodent concerns, avoid deep loose stone layers near foundations that provide nesting sites. Regular inspections and minimizing food sources outside reduce pest pressures while preserving the low-maintenance benefits of gravel landscaping.
Climate-specific Risks and Mitigation
In hot climates, gravel can radiate heat, stressing nearby plants and increasing ambient temperatures. Mitigate by choosing lighter-colored stone, adding shade trees, or creating plant islands to break up heat islands. In freeze-thaw regions, deeper bases and proper compaction prevent frost heave.
Heavy-rain climates require well-designed drainage, permeable transitions, and erosion control measures like retaining walls or planted swales. Prevent washouts by securing slopes with groundcover plants and terraces where necessary.
Assess local weather patterns before design and choose appropriate materials and installation techniques to reduce climate-related failures. Consulting regional guidelines or extension services helps tailor solutions to your environment.
Maintenance, Seasonal Care, and Lifespan
Routine Upkeep and Seasonal Tasks
Routine maintenance includes raking to redistribute displaced stone, hand-weeding, topping up surface gravel annually, and checking edging for failures. In spring, clear debris and check drip irrigation lines for clogs; in fall, remove leaf litter promptly to prevent organic buildup that fosters weeds.
For driveways, periodic re-grading and compaction may be needed where ruts form. Use a stiff broom or leaf blower to remove fine dust that can accumulate on stones and reduce permeability. Address small erosion channels after storms to prevent larger problems.
Document maintenance tasks and schedule light seasonal interventions rather than major repairs. Regular small efforts preserve appearance and function with minimal time investment.
| Task | Frequency |
|---|---|
| Raking/top-up | Annually |
| Weed checks | Monthly |
| Edge repairs | As needed |
When to Refresh or Replace Gravel
Refresh surface gravel when depth drops below recommended levels or the appearance becomes thin and patchy—typically every 3–7 years depending on use. Areas with heavy traffic or vehicle loads may need replenishment more often. Replace contaminated material if significant organic buildup or compaction reduces permeability.
For major rework, remove a portion of the top layer, recompact the base, and reapply fresh aggregate. Consider changing stone type if the original choice underperforms in your climate or intended use. Budget for periodic refreshes as part of lifecycle planning.
Longevity depends on installation quality: well-installed gravel landscapes with proper base layers can last decades with routine upkeep, while poorly installed areas often require early corrective work.
Long-term Performance and Warranty Considerations
If hiring contractors, request warranties on workmanship, especially regarding grading and compaction work. Material suppliers may offer guidance or guarantees on stone quality. Keep documentation and installation photos to support warranty claims if issues arise.
Properly specified contracts should outline responsibilities for drainage, edging, and cleanup. Ask for maintenance instructions and expected lifecycle estimates so you can plan for refreshes and ensure the contractor’s performance meets local standards.
Good installation paired with sensible maintenance yields reliable long-term performance and preserves the water- and labor-saving benefits of gravel landscaping for years to come.
Conclusion
Gravel Landscaping offers homeowners a durable, water-wise alternative to traditional lawns, reducing maintenance and supporting sustainable yard design. By focusing on proper grading, base preparation, plant selection, and targeted maintenance, gravel yards can be both functional and attractive.
Evaluate your site, budget, and climate, and consider professional input for complex drainage or driveway projects. If you’re ready to cut water use and maintenance, gravel landscaping can be a practical long-term investment—start with a small test area or consult local resources to plan your conversion.
Frequently Asked Questions
Is Gravel Landscaping Suitable for All Climates?
Gravel landscaping adapts well to arid and Mediterranean climates where water conservation is key, and can work in many temperate regions with proper drainage. In very wet or cold climates, design adjustments like deeper bases, erosion control, and selecting lighter stones can mitigate issues and preserve function.
How Do I Prevent Weeds from Growing Through Gravel?
Use a high-quality woven geotextile fabric with overlapped seams, install an adequate crushed-stone base, and apply a clean top layer of aggregate. Regularly remove organic debris and consider targeted pre-emergent herbicides where allowed to reduce seed germination effectively.
What Maintenance is Required for a Gravel Driveway?
Gravel driveways need occasional re-grading and compaction to fill ruts, periodic topping up of stone, and checking for washouts after storms. Edging helps contain material, and installing a strong base layer during installation reduces long-term upkeep and extends lifespan.
Can I Plant in a Gravel Landscape, and Which Plants Work Best?
Yes—plant in raised pockets or islands with amended soil and drip irrigation. Choose drought-tolerant species like succulents, ornamental grasses, Mediterranean herbs, and native shrubs that prefer well-drained conditions to thrive in gravel beds with minimal irrigation.
Are There Local Regulations or Incentives for Switching to Gravel Landscaping?
Many municipalities or water agencies offer incentives for water-wise landscaping—check local conservation programs and HOA rules before converting large lawn areas. Some areas require permits for significant hardscape changes, so verify local codes and potential rebates beforehand.
External resources: EPA WaterSense, Penn State Extension.


