


Warning: Cannot modify header information - headers already sent in /home/u278635817/domains/myhousegarden.com/public_html/wp-content/plugins/artigosgpt/artigosgpt.php on line 28454
Is your kitchen cleaning routine stuck on autopilot? Swap tired sponges for dish brushes and discover how baking soda makes grout shine—simple, effective moves seen in a cooktop demo that change daily kitchen hygiene.
Kitchen cleaning matters because it prevents cross-contamination, removes grease, and keeps surfaces safe for food prep. This guide shows practical tips, tool swaps, and demo-proven tricks to upgrade your routine quickly.
Read on to learn rapid swaps, grout rescue with baking soda, cooktop demo highlights, and step-by-step actions you can start today for a fresher, safer kitchen.
Quick wins: swap sponges for dish brushes to cut bacteria and odors
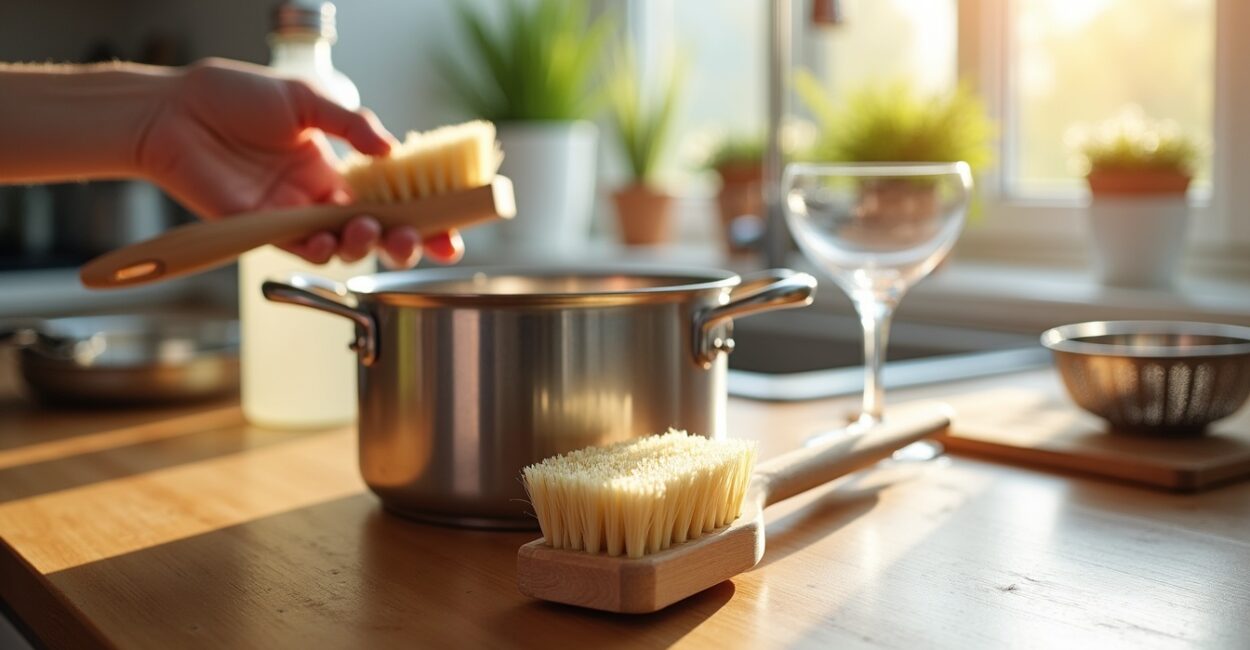
Why brushes beat sponges
Dish brushes dry faster than sponges, reducing bacterial growth, odor buildup, and mildew on countertops and cookware. They last longer and cut recurrent waste.
Using a brush also improves grease removal on pans and stainless steel, protecting finishes and preserving non-toxic cleaning habits in a busy kitchen.
Choosing the right brush
Pick a firm-bristled dish brush for caked-on food, a soft-bristled brush for delicate glass, and a long-handled brush for deep pots and strainers.
Look for sustainable materials, replaceable heads, and dishwasher-safe designs to balance durability, hygiene, and eco-friendly cleaning goals in the home.
Essential tools and materials for efficient kitchen cleaning
Core tools that change the game
Keep dish brushes, microfiber cloths, grout brushes, and a spray bottle with vinegar or eco-friendly degreaser handy for fast spot cleaning and deep scrubs.
Good tools simplify sanitizing high-touch areas like knobs, sinks, and backsplash while reducing reliance on disposable sponges and chemical cleaners.
Consumables and natural cleaners
Baking soda, white vinegar, liquid dish soap, and hydrogen peroxide handle most tasks: deodorizing, grout brightening, degreasing, and light disinfection.
These non-toxic options support food safety and reduce fumes, important when cleaning around cooktops, cookware, and cutting boards in small kitchens.
- Replace sponges weekly or switch to brushes
- Use microfiber for streak-free counters
- Store brushes upright to air dry
Deep clean strategies for countertops, grout, and cooktops
Countertop care and daily maintenance
Wipe spills immediately with a damp microfiber cloth, then sanitize weekly with dilute vinegar or approved surface cleaner to protect finishes and food prep areas.
Avoid abrasive cleaners on porous stones; blot stains on natural stone and reseal annually to guard against grease and moisture penetration into countertops.
Grout and backsplash revival with baking soda
Make a baking soda paste, apply to grout lines, scrub with a grout brush, and rinse. This lifts stains without harsh chemicals or damaging tile surfaces.
For stubborn discoloration, add a splash of hydrogen peroxide to the paste for oxidation; test in a discreet area to ensure color safety on grout.
Cooktop demo insights: techniques demonstrated and why they work
Demo highlights for gas and electric cooktops
Start cool, remove burner parts, soak removable pieces in warm soapy water, and use a brush to loosen baked-on grease before wiping surfaces clean.
Use a non-abrasive scrubber for glass cooktops, apply a baking soda paste to stubborn spots, and buff with a microfiber cloth for streak-free shine.
Safety tips during cooktop cleaning
Turn off gas and electric supply before deep cleaning, allow surfaces to cool fully, and avoid soaking electrical components to prevent hazards and damage.
Ventilate the area when using cleaning agents; keep flammable materials away from burners and follow manufacturer instructions for parts and finishes.
Step-by-step: fast grout rescue and cooktop sparkle
Prep and materials
Gather baking soda, hydrogen peroxide, a stiff grout brush, microfiber cloths, and a spray bottle with warm water to streamline the process.
Work in small sections to control drying, ensure even application, and prevent residue buildup on tile and cooktop surfaces for a polished finish.
- Remove loose debris by sweeping or vacuuming grout and cooktop crevices.
- Mix baking soda with water to form a spreadable paste.
- Apply paste to grout lines and stubborn cooktop spots; let sit five to ten minutes.
- Scrub grout with a stiff brush and scrub cooktop gently with a soft brush.
- Wipe away residue with a damp microfiber cloth, then dry thoroughly.
- Inspect and repeat on stubborn areas; finish by buffing surfaces for shine.
| Problem | DIY Fix | Time | Frequency |
|---|---|---|---|
| Grout staining | Baking soda paste + scrub | 10–20 minutes | Monthly |
| Cooktop grease | Soak parts + brush + baking soda | 15–30 minutes | Weekly |
| Smelly sponge | Replace with dish brush | 2 minutes | Weekly replacement |
Eco-friendly cleaning: effective and safe choices
Natural alternatives that perform
Baking soda deodorizes, vinegar cuts grease, and lemon brightens metal. These biodegradable choices reduce toxic residues on surfaces used for food prep.
Pair natural cleaners with mechanical action—scrubbing and brushing—to lift grime without relying on harsh chemical formulations that harm indoor air quality.
Reduce waste and choose reusable tools
Switch to brush heads that can be replaced, use washable microfiber, and avoid single-use wipes to minimize landfill waste and lower long-term costs.
Proper tool care—air drying brushes and laundering cloths—prevents odors and extends tool life, boosting both hygiene and sustainability in the kitchen.
- Choose refillable dish brushes and compostable cores
- Opt for concentrated cleaners to reduce plastic
- Use reusable cloths and launder regularly
Routine, habit formation, and maintaining sparkle
Simple daily rituals
After each meal, clear dishes, wipe counters with a damp microfiber, and rinse brush heads. Small habits prevent bigger cleaning sessions later.
Set a weekly deep-clean block to focus on grout, cooktop parts, and appliance fronts to keep grease and stains from becoming permanent fixtures.
Tracking and motivation
Use a cleaning checklist or timer to make quick wins visible. Celebrate small improvements like streak-free glass or revived grout to maintain momentum.
Share before-and-after photos in a group or social feed to gain encouragement; public accountability boosts consistency and makes kitchen cleaning feel rewarding.
Conclusion: small swaps, big difference
Swapping sponges for dish brushes and using baking soda on grout—demonstrated in a cooktop demo—turns time-consuming chores into smart, effective rituals. These small changes protect food safety, reduce odors, and deliver visible results.
Start with one swap today: replace the sponge, mix a baking soda paste, and watch your kitchen look and feel cleaner. The result is a safer, more joyful space for cooking and living.
Frequently Asked Questions
How often should I replace dish brushes compared to sponges?
Replace dish brushes every two to three months with regular use, or sooner if bristles fray. Unlike sponges, brushes dry faster and harbor fewer bacteria, extending useful life. Clean brush heads in the dishwasher weekly and inspect for odors or loose bristles to ensure safe, effective cleaning.
Can baking soda damage grout or tile surfaces?
Baking soda is mildly abrasive and generally safe for ceramic and porcelain tile; however, avoid heavy scrubbing on delicate natural stone. Test a small area first. For grout, combine baking soda with water and scrub gently to lift stains without chemical exposure or long-term damage to sealants.
Are there situations where sponges are better than brushes?
Sponges can be useful for smoothing liquids and wiping textured surfaces quickly, but they retain moisture and bacteria. For most dishwashing and greasy residue, brushes outperform sponges. Use sponges briefly for delicate wiping, then sanitize or replace frequently to limit contamination.
What cleaning products are safe to use on stainless steel cooktops?
Use mild dish soap, baking soda paste, or manufacturer-approved stainless steel cleaners to avoid scratching. Apply with a soft cloth or non-abrasive scrubber, always wiping in the grain direction. Avoid bleach and harsh abrasives that can dull finishes and damage protective coatings.
How can I maintain grout whiteness long-term after cleaning?
Seal grout after thorough cleaning and allow it to cure; reseal yearly for high-traffic kitchens. Regularly spot-clean with baking soda and water, and avoid harsh cleaners that strip sealants. Keep grout dry when possible to deter mold and maintain a bright, long-lasting appearance.
External resources: CDC guidance on food safety for kitchens (CDC Food Safety), EPA recommendations for disinfection (EPA), and practical tips from Good Housekeeping (Good Housekeeping).


