


Warning: Cannot modify header information - headers already sent in /home/u278635817/domains/myhousegarden.com/public_html/wp-content/plugins/artigosgpt/artigosgpt.php on line 28454
Imagine arriving home to a kitchen that welcomes you with warm, efficient kitchen counter lighting that highlights recipes and moods alike. Kitchen counter lighting transforms countertops into stages, making cooking easier and evenings cozier.
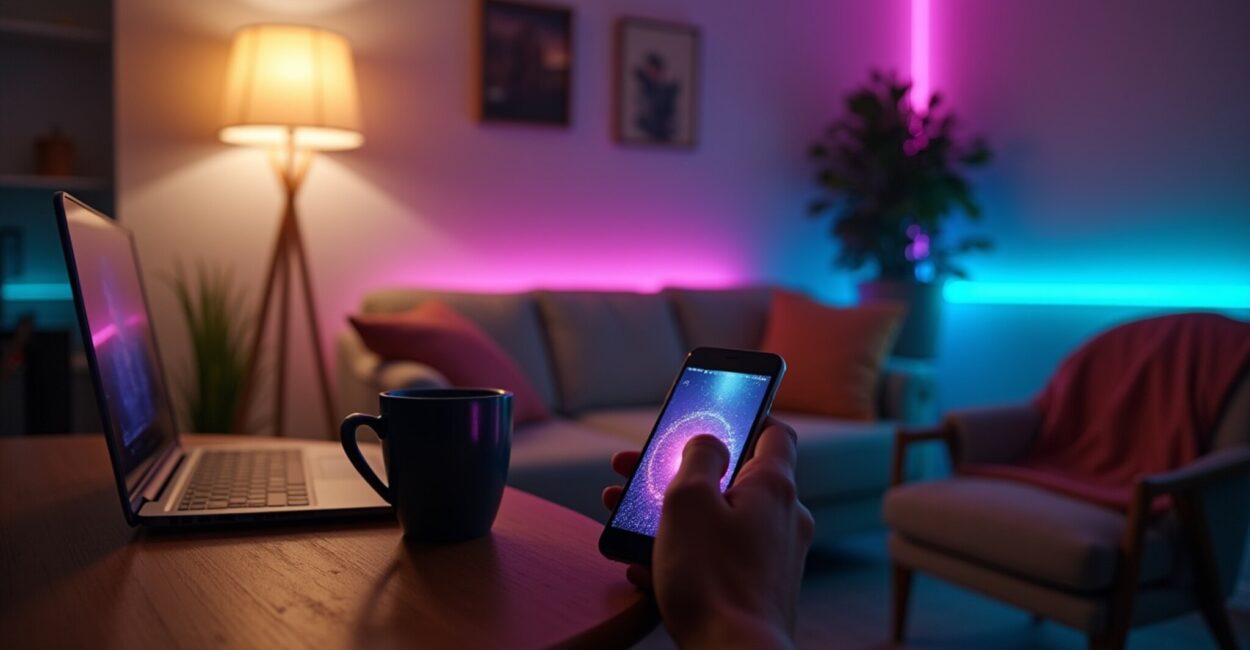
Today’s trends — from Philips Hue strips to smart under-cabinet LEDs — blend task illumination, ambient glow, and color temperature control to match modern smart homes and minimalist designs. This article explores practical options, installation tips, and 2025 trends to modernize your space.
You’ll discover which smart strips, under-cabinet fixtures, dimmer strategies, and sensor options best suit your budget and style, plus a clear plan to upgrade your counters quickly and beautifully.
Why kitchen counter lighting matters now: function, mood, and tech
Essential task light benefits
Bright under-cabinet LEDs provide focused task lighting for chopping and prep, reducing shadows and improving safety with true color rendering. They make food prep faster and safer.
Energy-efficient LED strips lower power use and last longer than halogens. Smart control adds dimming and schedules so task lights work when you need them most.
Mood, ambiance, and scene control
Accent options like Philips Hue strips and RGB LEDs deliver mood lighting that adapts throughout the day. Warm whites for mornings, vivid colors for evenings, subtle accents for guests.
Scenes and color temperature tuning let you shift between functional daylight for cooking and cozy warm tones for dining without rewiring or swapping fixtures.
Top smart products and innovations in 2025
Philips Hue strips and integrations
Philips Hue LED strips pair with bridges and apps for seamless scene control, voice commands, and routines integrated with smart home hubs like Alexa and Google Home.
They offer tunable whites and millions of colors, making them ideal for accenting backsplash edges and floating shelves for a designer finish.
Dedicated under-cabinet smart fixtures
Smart under-cabinet LEDs include built-in dimmers, tunable white, and motion sensors. Many models use low-profile profiles that hide behind cabinet lips.
They often support app control and schedules, improving convenience while reducing kitchen clutter and visible wiring for a clean aesthetic.
Designs and placements that elevate countertops
Placement for even, glare-free task light
Mount strips near the front lip of cabinets or beneath the bulkhead for uniform illumination across the counter without casting your own shadow while working.
Use diffusers or aluminum channels to soften hotspots and create a continuous, professional-looking wash of light across tiles and countertops.
Accent strategies and layered lighting
Combine recessed ceiling lights, pendant fixtures, and under-cabinet LEDs to layer ambient, task, and accent lighting for depth and flexibility in every activity.
Accent the backsplash with color-tuned strips and reserve bright whites for prep zones to maintain both function and visual interest.
Practical installation guide and quick upgrade steps
Preparing your workspace
Measure under-cabinet length and check for power sources. Confirm transformer needs for low-voltage LED strips and note cabinet overhang for mounting channels.
Turn off power at the breaker before touching wiring. Use adhesive-backed channels for temporary setups and screws for permanent fixtures to ensure longevity.
Step-by-step upgrade plan
- Measure the countertop length and select suitable LED strips or fixtures.
- Choose power supplies and controllers compatible with your chosen LEDs.
- Install mounting channels or brackets, securing them to cabinet undersides.
- Connect wiring, test lights, and hide wiring with trim or conduit.
- Set up app control, scenes, and schedules for convenience.
Follow local electrical codes and consult an electrician for hardwired installations. Smart plug options exist for plug-and-play convenience without rewiring.
Energy, color temperature, and health considerations
Energy efficiency and lumen choices
Choose LEDs with 300–700 lumens per foot for balanced counter illumination. Higher lumens suit larger counters or dimmer-free setups requiring more output.
Look for ENERGY STAR-rated drivers and efficient LEDs to reduce utility bills while maintaining bright, crisp light for prep tasks.
Color temperature and circadian impacts
Use 2700–3000K for warm evening ambiance and 3000–4000K for neutral task lighting. Tunable-white systems allow changes to support circadian rhythms and comfort.
Avoid harsh blue-rich light at night to prevent sleep disruption. Smart programming can reduce blue light in late hours automatically.
Cost, ROI, and upgrade scenarios
Budget options vs. premium systems
Basic plug-in LED strips provide instant improvement at low cost, while integrated smart fixtures and Philips Hue systems add convenience and customizability at higher investment.
Factor installation, controllers, and potential electrician fees into your budget. DIY-friendly kits minimize labor costs and speed up ROI through energy savings.
How to evaluate ROI and resale appeal
Investments that improve safety, energy efficiency, and aesthetics often increase home appeal. Smart, well-lit kitchens can justify higher asking prices and faster sales.
Document upgrades and warranties when selling. Buyers value modern, integrated lighting that’s easy to operate and aesthetically pleasing.
Maintenance, troubleshooting, and future-proofing
Routine care and simple fixes
Clean LED channels and strips gently with a soft cloth. Replace faulty drivers rather than entire strips to save cost and reduce waste. Keep firmware updated for smart devices.
Track heat buildup; ensure vents and spacing under cabinets to extend LED lifespan. Use quality power supplies to prevent flicker and premature failure.
Compatibility and upgrade paths
Choose controllers supporting common protocols (Zigbee, Bluetooth, Wi‑Fi) for future upgrades. Modular systems allow swapping strips for brighter or tunable versions later.
Plan for interoperability with smart hubs to keep your kitchen counter lighting flexible as new devices emerge in 2025 and beyond.
| Option | Best for | Average cost | Smart features |
|---|---|---|---|
| Plug-in LED strip | DIY renters | $20–$80 | Basic dimming (some models) |
| Hardwired under-cabinet LED | Permanent installs | $100–$400 | Tunable white, dimmers |
| Philips Hue strips | Smart home enthusiasts | $80–$200 | Color, scenes, voice control |
| Integrated smart fixture | High-end kitchens | $200–$600 | Motion, schedules, hub integration |
Kitchen counter lighting is a high-impact, relatively low-effort upgrade that blends safety, style, and smart home convenience. Whether you choose Philips Hue strips or discreet under-cabinet LEDs, a well-lit counter changes how your kitchen feels and functions.
Return to the image of that welcoming glow: with the right fixtures and a thoughtful plan, your kitchen will invite cooking, conversation, and calm. Start small, think smart, and let light shape the way you live.
FAQ
What is the best color temperature for kitchen counter lighting?
The ideal color temperature for kitchen counter lighting balances clarity and comfort. For task-oriented prep, 3000–4000K provides crisp, neutral light that enhances contrast and color accuracy. For ambient or dining moments, 2700–3000K creates a warm, inviting glow. Tunable-white systems let you switch between these temperatures, offering functional daylight for cooking and cozy warm light for evenings and social time.
Can I install Philips Hue strips under my cabinets myself?
Yes, many Philips Hue strip installations are DIY-friendly if you have basic tools and steady hands. Measure accurately, use aluminum channels for diffusion, and secure a nearby power outlet. For hardwired or concealed wiring, consult an electrician. Ensure compatibility with your Hue bridge or app, and follow manufacturer instructions for mounting, cutting, and sealing strips to avoid damage and maintain warranty.
How do I avoid shadows while lighting my kitchen counters?
Avoid shadows by placing under-cabinet lighting near the front edge of cabinets and using continuous LED channels to create even light across the work surface. Combine with overhead recessed lights or pendant fixtures to reduce directional shadows from your body while you work. Diffusers and wider beam angles help create a uniform wash, and multiple light layers prevent harsh contrasts and improve visibility for detailed tasks.
Are smart under-cabinet LEDs worth the extra cost?
Smart under-cabinet LEDs add convenience through dimming, schedules, motion sensing, and color tuning, often justifying higher upfront costs with improved usability and mood control. They integrate with smart home systems for voice control and automation, enhancing daily routines. For resale value and long-term satisfaction, the adaptability and energy savings of smart options often make them a worthwhile investment for modern kitchens.
What maintenance do under-cabinet LEDs require?
Under-cabinet LEDs require minimal maintenance: keep fixtures dust-free, occasionally wipe diffusers, and ensure drivers stay cool and ventilated. Replace drivers rather than entire strips if failures occur. Update firmware for smart controllers to maintain compatibility. Inspect adhesive bonds and mounting clips annually, and address flicker immediately, which often indicates a failing power supply or loose connection that’s simple to fix.
Further reading and authoritative resources: Philips Hue and ENERGY STAR for efficiency guidelines. For reviews and comparisons, see CNET.


