


Warning: Cannot modify header information - headers already sent in /home/u278635817/domains/myhousegarden.com/public_html/wp-content/plugins/artigosgpt/artigosgpt.php on line 28454
Orchid repotting often feels like a delicate rescue mission — you want happy roots, thriving blooms, and zero disasters. If you’ve ever feared killing a favorite plant during a pot change, you’re not alone; many growers worry about root damage and poor mixes.
This guide explains orchid repotting with compassion and clarity, highlighting common traps like repotting into a dense mix (e.g., fine bark) that can smother roots — a frequent harm to Vandas. Read on to learn safe timing, correct mixes, and confident steps.
You’ll discover practical repotting methods, a simple step-by-step routine, and expert tips to avoid suffocating roots while boosting flowering and root health. Expect action-ready advice and resources to deepen your orchid care skills.
When and Why to Repot: Timing, signs, and root health
Recognizing the right moment
Healthy orchid repotting starts with clear signs: crowded roots, decayed medium, or poor flowering. Watch for roots growing out of the pot or a compacted substrate.
Repot during active growth for best recovery. For most orchids, spring or after new roots appear is ideal; avoid repotting in full bloom unless necessary.
Risks of wrong timing and dense mixes
Repotting into a dense mix such as fine bark can smother roots, reduce aeration and trap moisture. Vandas and epiphytic orchids are especially vulnerable to dense media.
Using a heavy, compact mix shortens root life and invites rot. Choose coarse, airy substrates that mimic natural epiphytic conditions for safety.
Choosing the Right Medium: Mixes, aeration, and moisture balance
Coarse vs. fine bark explained
Coarse bark, charcoal, and sphagnum promote airflow around roots and quick drainage. Fine bark compacts and reduces oxygen, creating smothering conditions.
Match the mix to species needs: Vandas prefer large bark chips or broken chunks; terrestrials like some Cattleyas accept finer materials but still need drainage.
Adding ingredients for balance
Incorporate charcoal, tree fern, or perlite for aeration. These additions stabilize pH, improve drainage, and prevent medium compaction over time.
Use long-lasting chunky components to reduce repot frequency. Replace decomposing media promptly to avoid root suffocation and disease.
Tools and Prep: Essentials for a smooth repot
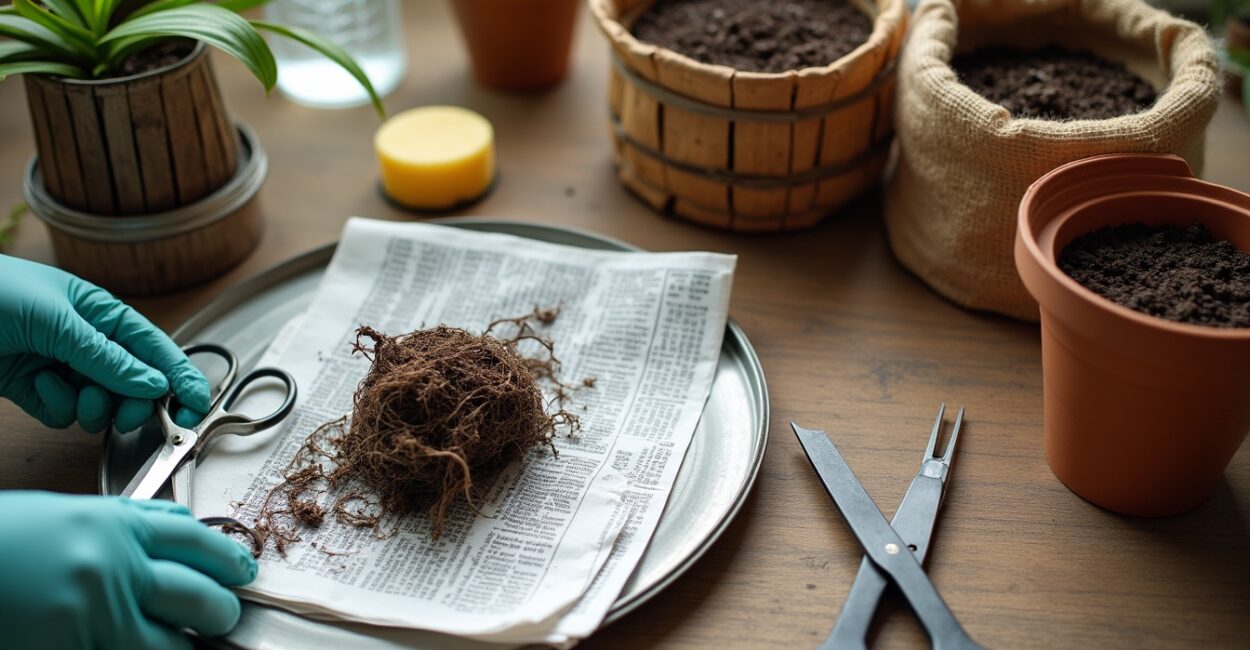
Sanitize and prepare tools
Disinfect scissors, tweezers, and pots with diluted bleach or alcohol. Clean tools prevent introducing pathogens during orchid repotting.
Prepare fresh media and a slightly larger pot. For epiphytes like Vandas, choose open baskets or wired mounts to support airflow.
Choosing pots and mounts
Use terracotta, slotted plastic pots, or wooden baskets for aeration. Vandas often thrive in slatted baskets or mounted setups rather than deep, unsupported pots.
Select a pot that fits the root mass with slight room to grow. Avoid oversized containers that retain excess moisture and invite rot.
Repotting Step-by-Step: Practical workflow and quick checklist
Quick routine before starting
Gather all supplies, set a clean workspace, and water the orchid a day before repotting for easier root manipulation. This reduces stress and breakage.
Label the plant and note current growth. Knowing root health and previous medium type helps choose an improved, breathable substrate.
Step-by-step repotting
- Remove the orchid gently from its pot, supporting the base and roots.
- Trim dead or mushy roots with sterile tools, cutting to healthy tissue.
- Shake off old media; rinse roots if heavily decomposed or dirty.
- Place fresh coarse mix in the new container, position plant, and fill around roots firmly but not compacted.
- Stabilize the plant, water lightly, and allow shaded recovery for several days.
Common Mistakes and How to Avoid Them
Overpotting and dense mixes
Overpotting invites excess moisture; dense mixes like fine bark pack down and suffocate roots. Vandas frequently suffer when growers use too-fine substrates.
Prevent this by choosing appropriately sized pots and chunky, fast-draining media. Monitor moisture and watch for early signs of root decline.
Poor aftercare and placement
Placing a repotted orchid in low light or too-wet conditions causes stress. After repotting, provide bright, indirect light and good air circulation to aid recovery.
Maintain humidity without waterlogging — misting and airflow avoid fungal problems while supporting new root growth and bloom potential.
Media Comparison Table: Quick reference for popular orchid substrates
How to read the table
This table compares common mixes for aeration, longevity, and suitability for Vandas and other epiphytes. Use it to choose a non-smothering substrate.
Prioritize coarse, chunky materials that allow oxygen exchange and resist compaction for reliable orchid repotting success.
| Medium | Aeration | Longevity | Best for |
|---|---|---|---|
| Coarse Fir Bark | High | 6–18 months | Phalaenopsis, Cattleyas |
| Chunky Bark / Coconut Husk | Very High | 12–24 months | Vandas, Cattleyas |
| Fine Bark | Low (compacts) | 3–9 months | Some terrestrials; avoid for epiphytes |
| Sphagnum Moss | Moderate | 3–12 months | Humidity-loving orchids, mounts |
Advanced Tips: Species-specific advice and expert tweaks
Vandas and epiphytes
Vandas hate dense mixes. Use large chunks, slatted baskets, or mounts to allow air around aerial roots and prevent smothering. Avoid fine bark entirely.
Provide bright light and frequent misting or root soaking. Their roots absorb moisture from the air and need both humidity and airflow for best growth.
Terrestrial and captive hybrids
Some terrestrials tolerate finer mixes but still require drainage. Mix peat or fir bark with perlite for moisture control without compaction.
Adjust watering frequency carefully after repotting. Watch leaf turgor and root color to gauge hydration rather than relying on a fixed schedule.
Conclusion: Confident repotting without smothering roots
Orchid repotting becomes empowering when you prioritize aeration, match species needs, and avoid compact, fine mixes that smother roots. Your Vandas and epiphytes will reward careful, airy media with stronger roots and fuller blooms.
Return to the hook: repot thoughtfully, choose chunky substrates, and act with gentle precision — your orchid’s recovery and future flowering depend on those choices.
FAQ
How often should I repot my orchids to avoid root suffocation?
Most orchids need repotting every 12–24 months depending on medium breakdown and root crowding. Check annually for compacted or decomposed substrate, root rot, or roots escaping the pot. Repot when the mix no longer drains or when roots form a tight mass, avoiding dense, fine bark that smothers roots.
Can I use fine bark if I mix it with other materials?
Fine bark mixed with chunky components can work if the coarse fraction dominates. Ensure at least 60–70% coarse material to maintain aeration; otherwise the fine particles will settle and compact, reducing oxygen and risking root suffocation, especially for Vandas and epiphytes.
What are the safest substrates for Vandas to prevent root damage?
Vandas thrive in very open media: large charcoal pieces, chunky bark, or slatted baskets. Mounting on wood or cork with sphagnum pockets is also excellent. Avoid any fine, compacting mixes because aerial roots need direct airflow and will suffocate in dense substrates.
How should I trim roots during repotting without harming the plant?
Only remove truly dead, mushy, or blackened roots using sterile scissors. Cut back to healthy white or green tissue. Minimal pruning reduces shock; disinfect tools between cuts to prevent spreading rot. Allow trimmed roots to dry slightly before repotting into fresh, airy mix.
Where can I find reliable guidance and community support?
Trusted resources include the American Orchid Society for cultural notes and Kew’s orchid resources for botanical context. Join local orchid societies or forums to learn species-specific tips and avoid common mistakes like using dense media that suffocate roots.
External resources: American Orchid Society (aos.org) and Kew Gardens orchid care pages (kew.org).


