


Warning: Cannot modify header information - headers already sent in /home/u278635817/domains/myhousegarden.com/public_html/wp-content/plugins/artigosgpt/artigosgpt.php on line 28454
Succulent propagation can feel like a small, hopeful miracle—tiny leaves or stems transforming into full, resilient plants. This guide dives into practical methods, fast-rooting cuttings, and why learning succulent propagation rewires your green confidence.
With houseplant trends soaring, succulent propagation is more relevant than ever for saving money, sharing plants, and repairing overwatered survivors. You’ll learn proven techniques, quick-rooting species like Echeveria and Crassula ovata, and setups optimized for success.
Read on to discover seven fast-rooting cuttings, step-by-step leaf and stem methods, and pro tips to help your succulents thrive—ideal for mobile reading and quick action.
1. Why succulent propagation matters now
Understanding propagation benefits
Propagating succulents saves money and builds a personalized collection. It connects you to plant biology and encourages sustainable plant care.
Succulent propagation promotes resilience, allowing you to rescue overwatered or leggy plants and create gifts rooted in patience.
Common goals and outcomes
Gardeners propagate to multiply favorites, restore crowns, or experiment with colors. Expect varying root times, leaf vs. stem success, and growth pace.
Knowing species traits, soil, light, and humidity helps you predict results and accelerate healthy root development for more predictable propagation.
2. Seven fast-rooting cuttings to try
Top leaf and stem choices
Start with Echeveria leaves for high success rates; Kalanchoe and Haworthia also root quickly. Try semi-hardwood stems for faster establishment.
Crassula ovata stem cuttings are reliable and often root within weeks. Sempervivum offsets and Graptopetalum leaves also produce fast results.
Matching method to species
Leaf propagation suits rosettes like Echeveria and Graptopetalum. Stem cuttings work for vining or woody succulents such as Crassula or Sedum.
Experiment by pairing soil type, humidity, and light intensity to find the sweet spot for each species and cutting type.
- Echeveria: leaf propagation, bright light.
- Crassula ovata: stem cuttings, quick roots.
- Graptopetalum: leaves that callus fast.
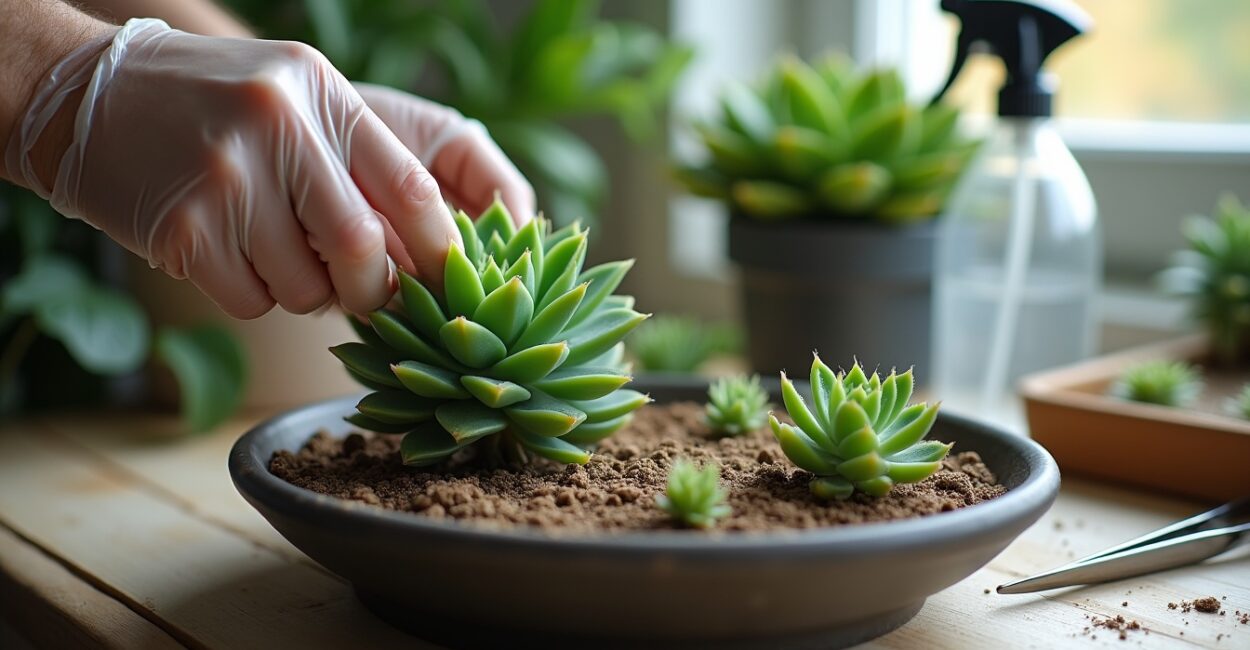
3. Leaf propagation step-by-step (Echeveria focus)
Preparing and removing leaves
Select healthy, mature leaves and twist gently to remove the entire base. Leaves with tears rarely root and often rot instead.
Let leaves dry in shade until callused—usually 24–72 hours. A clean callus prevents infection and encourages root initiation.
Rooting and early care
Place callused leaves on well-draining soil and mist occasionally. Avoid burying leaves; roots form from the leaf base over weeks.
Provide bright, indirect light and patience. Tiny roots and fuzz-like baby rosettes signal success; then water sparingly to avoid rot.
4. Stem cuttings and rapid rooting (Crassula ovata example)
How to take healthy stem cuttings
Use a clean, sharp knife to cut 2–4 inch stem segments. Allow cuts to callus 2–7 days before planting to reduce rot risk.
Remove lower leaves so the cutting can sit firmly in soil. A slightly woody base often roots faster than fresh green tissue.
Planting and watering routine
Insert callused stems into fast-draining mix and water lightly after 7–10 days. Too early watering invites fungal issues and delays rooting.
Maintain bright indirect light and warm temperatures for optimal root growth; misting once a week often suffices for humidity without waterlogging.
| Cutting Type | Typical Root Time | Best Soil Mix |
|---|---|---|
| Echeveria leaf | 2–6 weeks | 50% grit + 50% potting |
| Crassula ovata stem | 2–4 weeks | 60% coarse sand + 40% peat |
| Haworthia leaf | 3–8 weeks | 50% perlite + 50% soil |
- Clean and cut a healthy stem or remove a full leaf.
- Let the cutting callus for 2–7 days in shade.
- Prepare a fast-draining soil mix and plant the cutting.
- Place in bright, indirect light and water sparingly after roots appear.
5. Environmental factors that speed rooting
Light, temperature, and humidity
Bright indirect light encourages photosynthesis without burning tender cuttings. Warmth between 65–75°F accelerates root growth.
Moderate humidity helps leaves avoid desiccation while callusing. Avoid constant high humidity that promotes fungal diseases.
Soil and nutrients
Use gritty, well-draining media to prevent standing water. Fertilize lightly only after roots establish to avoid burning delicate new tissue.
Rooting hormones can boost success on stubborn species. A low-concentration auxin powder often results in faster, denser roots.
- Use well-draining soil: perlite, pumice, coarse sand.
- Keep temperatures warm but stable to encourage roots.
- Introduce diluted fertilizer only after visible roots form.
6. Troubleshooting: rot, pests, and failures
Identifying rot and preventing it
Blackened or soft bases indicate rot. Remove affected tissue immediately and allow the cutting to dry before reattempting propagation.
Ensure adequate airflow and reduce watering frequency. Repotting in fresh, dry mix often saves recoverable cuttings from persistent rot.
Dealing with pests and slow growth
Mealybugs and fungus gnats can hinder rooting. Isolate new cuttings and inspect regularly, using alcohol swabs for small infestations.
Slow growth often stems from low light or cold temperatures. Adjust the environment and be patient; succulents naturally take time to establish roots.
7. Advanced tips for faster success and scaling up
Propagating at scale
Set up trays with uniform soil, label species, and stagger propagation cycles. Consistency in light and watering yields predictable results.
Use humidity domes for the first week to reduce stress, then gradually acclimate new plants to drier air and stronger light.
Creative methods and experiments
Experiment with bottom heat mats for faster rooting in cooler climates. Try semi-hydroponic setups for certain species to observe root behavior.
Keep a propagation journal to track species, root times, and success rates. Data helps refine methods and boosts future wins.
Conclusion
Succulent propagation turns small choices into growth and joy—whether using Echeveria leaves or Crassula ovata stems. Return to the opening curiosity: tiny cuttings can become thriving plants with the right care. Start small, track results, and enjoy the rewarding patience of propagation.
FAQ
How long does succulent propagation usually take?
Rooting times vary by species and method; leaves often take two to eight weeks while stem cuttings can root in two to four weeks. Temperature, light, humidity, and soil quality strongly influence timing, so monitor conditions and be patient as roots develop.
Can I use regular potting soil for propagation?
Regular potting soil often retains too much moisture and increases rot risk. Use a fast-draining mix with perlite, coarse sand, or pumice for succulent propagation to ensure airflow and prevent waterlogged conditions that harm cuttings.
Should I use rooting hormone for succulents?
Rooting hormones can improve success for difficult species and shorten root times. Use a low-concentration auxin powder or liquid and apply sparingly to the callused end before planting to reduce stress and encourage root formation.
How often should I water new cuttings?
Wait to water until roots appear or after a week for stems. Mist leaves lightly to prevent desiccation, but avoid saturating soil. Overwatering is the leading cause of failure, so err on the side of dryness initially.
Can I propagate succulents indoors year-round?
Yes, with controlled light and temperature. Provide bright, indirect light or supplemental grow lights, maintain warm temperatures around 65–75°F, and ensure proper airflow and fast-draining soil for year-round propagation success.
Further reading and trusted sources: Royal Horticultural Society propagation guide, Missouri Botanical Garden propagation resources.


