


Warning: Cannot modify header information - headers already sent in /home/u278635817/domains/myhousegarden.com/public_html/wp-content/plugins/artigosgpt/artigosgpt.php on line 28454
Feeling the chill every winter and watching energy bills climb? Home insulation tips can cut those costs and keep your rooms cozy without a full remodel.
In 2025, simple upgrades like attic foam or fiberglass batts deliver fast wins—lower bills, quieter rooms, and real comfort. This guide shows practical, prioritized steps to act fast.
Read on to discover proven insulation strategies, quick DIY wins and professional choices that pay back in months, not years.
Why insulation matters now: save money and stay comfortable
Heat loss and energy bills
Heat escapes through ceilings, walls and drafty windows; insulation reduces heat transfer and lowers furnace runtime. Proper sealing and insulation directly cut monthly energy expenses.
Understanding heat flow helps you prioritize attic, wall cavities and rim-joist work for the biggest returns this season.
Comfort and indoor air quality
Insulation stabilizes indoor temperatures, reduces drafts and minimizes moisture problems that lead to mold. Better insulation equals a healthier, more comfortable home year-round.
Tighter envelopes also improve HVAC performance and can make your home quieter by damping outside noise and room-to-room drafts.
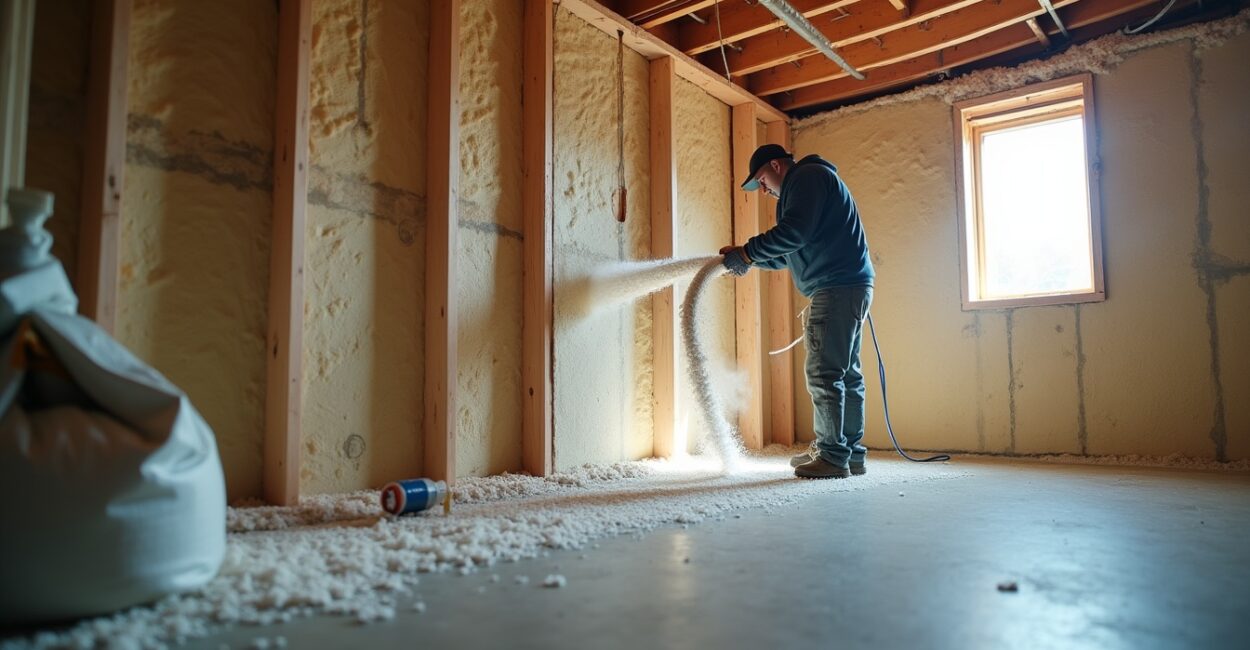
Fast attic upgrades that deliver quick savings
Spray foam vs. fiberglass batt
Spray foam fills gaps and insulates irregular spaces; fiberglass batts are cheaper and DIY-friendly. Both cut heat loss when installed correctly in attics.
Choose spray foam for air-sealing and persistent drafts; choose batts for budget upgrades and straightforward attic coverage.
Insulating and air sealing together
Air sealing doors, ducts and attic hatches before insulating multiplies savings. Seal gaps with caulk, foam and weatherstripping for measurable bill reductions.
Small fixes like attic door insulation or sealing recessed lights often yield outsized savings and comfort improvements quickly.
- Prioritize attic floor insulation depth increase.
- Seal attic bypasses: vents, chases, and plumbing penetrations.
- Inspect attic ventilation to avoid moisture buildup.
Walls and rim-joist: hidden spots that leak heat
Blown-in insulation for cavity fill
Blown cellulose or fiberglass can fill existing wall cavities without major demolition. This reduces drafty walls and improves overall thermal performance.
Injection methods are cost-effective for older homes and can be done room-by-room to spread cost over time.
Rim-joist and band joist sealing
Rim-joists are common leak paths. Apply closed-cell spray foam or rigid insulation board plus sealant to eliminate drafts and cold floors.
Addressing rim-joist heat loss often yields noticeable comfort gains in basements and first floors during winter.
Windows, doors and air sealing: plug the visible leaks
Weatherstripping and door sweeps
Weatherstripping around moving parts and door sweeps at thresholds are fast, low-cost fixes that reduce drafts immediately and improve comfort.
Replace worn strips annually and match materials to the climate for best longevity and performance.
Window film and storm windows
Low-cost insulating window film or adding storm windows raises R-value and reduces radiant heat loss through glass during cold months.
For longer-term improvement, prioritize double- or triple-pane upgrades where single-pane windows cause major losses.
| Upgrade | Typical Cost | Estimated Payback | Impact |
|---|---|---|---|
| Attic fiberglass batts | $400–$1,000 | 1–3 years | High on heating savings |
| Closed-cell spray foam (attic/rim) | $1,500–$5,000 | 3–7 years | Excellent air-sealing |
| Blown-in wall insulation | $1,000–$3,000 | 2–5 years | Good for retrofit |
| Weatherstripping & door sweeps | $20–$150 | Months | Immediate comfort boost |
Insulation materials: pros, cons and best uses
Fiberglass, cellulose and foam overview
Fiberglass batts are affordable and DIY-friendly; cellulose offers excellent coverage and eco-appeal; spray foam provides air sealing and high R-value.
Match material to location: batts for attics, blown for walls, foam for rim-joists and irregular cavities.
Moisture, mold and long-term durability
Choose materials compatible with your climate and moisture profile to prevent mold issues. Proper ventilation and vapor management are essential.
Combine insulation with air barriers and drainage planes to ensure longevity and protect indoor air quality.
DIY vs professional: when to hire help
Simple DIY upgrades
Install attic batts, add weatherstripping and apply window film yourself to get fast wins and low costs. Proper PPE and technique matter for safety.
DIY is ideal for accessible, non-structural work with clear instructions and basic tools.
Call a pro when complexity rises
Hire professionals for spray foam, wall injections, or if insulation intersects with electrical, plumbing or HVAC systems. Pros ensure code compliance and long-term performance.
Get multiple quotes, check certifications and read reviews before committing to a contractor for major work.
- Inspect attic and identify gaps and existing insulation depth.
- Seal obvious air leaks with caulk and foam.
- Add attic insulation or upgrade to higher R-value batts.
- Address rim-joist and basement leaks with foam or board.
- Improve windows/doors with weatherstripping and film.
Energy rebates, incentives and measuring results
Find local rebates and federal incentives
Many utilities and governments offer rebates for insulation upgrades. Check ENERGY STAR and local utility programs to offset upfront costs.
Paperwork and eligibility vary; document before-and-after conditions and save receipts to claim incentives.
Measure savings and comfort
Track energy bills before and after upgrades, and use temperature sensors to quantify comfort improvements room-by-room. A blower-door test reveals remaining leaks.
Documenting results helps prioritize next steps and supports any warranty or rebate claims.
- Check ENERGY STAR incentives: energystar.gov
- Search local utility rebate pages for insulation programs (target=”_blank”).
- Consider a professional energy audit for a tailored plan.
Conclusion
Smart home insulation tips turn winter dread into warmth and measurable savings. Whether you choose attic batts, blown-in walls, or strategic air sealing, quick wins like attic foam and fiberglass batts reduce bills fast.
Start with the attic and obvious leaks, leverage rebates, and measure results—your comfort and wallet will thank you this season.
FAQ
How quickly will I see savings after insulation upgrades?
Most homeowners notice lower heating or cooling bills within the first billing cycle after insulation upgrades, especially when attic or rim-joist gaps are sealed. Savings size depends on existing insulation levels, local climate and energy prices, but many see measurable reductions in 1–3 months after completing targeted upgrades and sealing major air leaks properly.
Can I install fiberglass batts in my attic myself?
Yes, many homeowners successfully install fiberglass batts in accessible attics using basic tools, protective gear and careful fitting to avoid gaps. Follow manufacturer R-value guidance, avoid compressing batts, and seal attic bypasses first. For complex ventilation, electrical or insulation depth issues, consult a professional to ensure safety and performance.
Is spray foam worth the higher cost compared to fiberglass?
Spray foam offers superior air sealing and higher effective R-value per inch, making it worth the extra cost where air leaks are significant or spaces are irregular. It provides long-term performance and energy savings, but fiberglass remains a cost-effective option for add-on attic coverage or large accessible areas where air sealing is done separately.
Which insulation upgrades qualify for rebates or tax credits?
Many insulation projects, including attic, wall and whole-home upgrades, can qualify for utility rebates or federal tax credits when performed to program standards. Eligibility often requires specific materials or contractor certifications. Always verify current programs with ENERGY STAR or your local utility and keep documentation and receipts for claims and compliance.
How do I choose the right R-value for my climate?
Choose R-value based on local climate zones, home orientation and heating or cooling needs; colder climates need higher R-values in attics and walls. Use local building codes and ENERGY STAR guidelines as a baseline, then prioritize air sealing and attic depth first to maximize performance relative to cost and comfort.


