


Warning: Cannot modify header information - headers already sent in /home/u278635817/domains/myhousegarden.com/public_html/wp-content/plugins/artigosgpt/artigosgpt.php on line 28454
Living wall installations bring lush vertical greenery into interiors and exteriors, transforming flat surfaces into thriving ecosystems that improve air quality and aesthetics. A living wall, composed of plants mounted on a structure attached to a building or freestanding frame, matters because it reduces heat, boosts wellbeing, and optimizes limited space—ideal for urban homes and commercial designs.
Choosing the right style, plants, and materials requires balancing light, irrigation, and maintenance with design goals. This guide helps you evaluate options, compare methods, and plan installations that suit budgets and climates while highlighting practical inspiration and performance-minded choices for every scale.
Below you’ll find step-by-step procedures, plant selections, cost data, comparative tables, maintenance tips, and real-world ideas to launch a living wall project that’s beautiful, resilient, and SEO-optimized for performance.
Basic living wall concepts and definitions
What defines a vertical garden and its core components
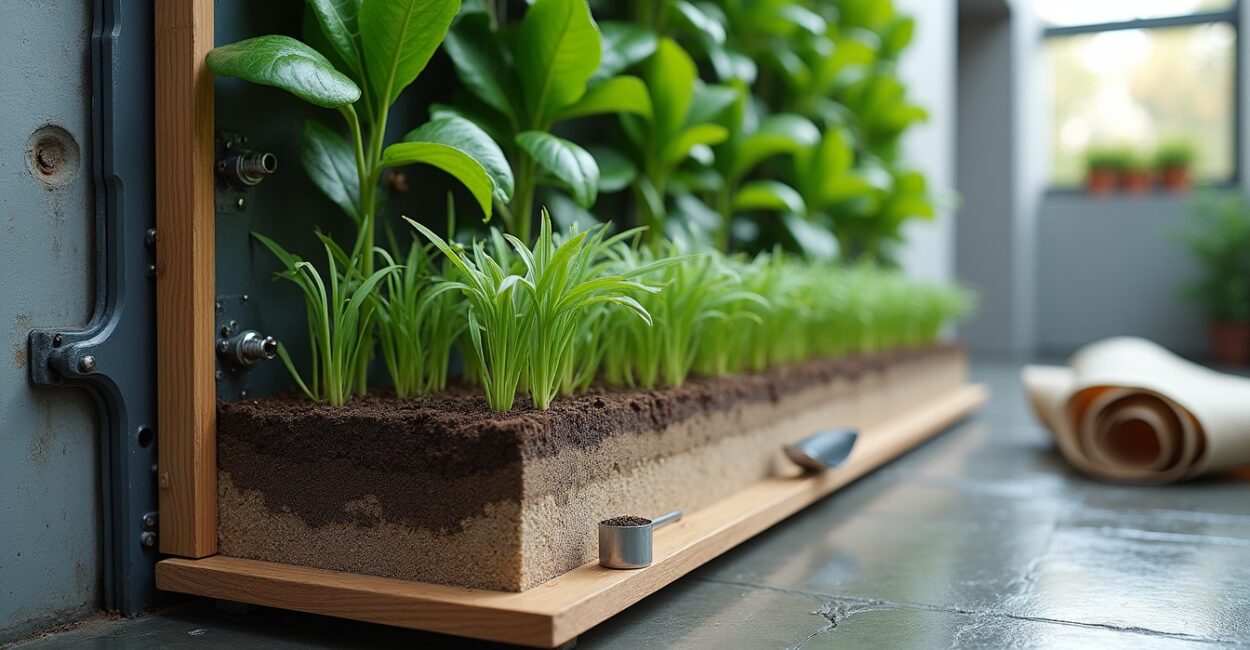
A vertical garden is a planted system mounted vertically, integrating a support structure, growing medium, irrigation, and plant palette. The support can be modular panels, felt pockets, or engineered trays; each choice changes weight, root volume, and maintenance needs. Understanding these core components helps determine site suitability and long-term upkeep for indoor or outdoor living wall installations.
Plant selection and substrate depth influence irrigation frequency and structural load. Lightweight substrates like hydroponic mats reduce weight but demand precise water delivery, while soil-based pockets offer buffering at the cost of heavier frames. Consider wind exposure, sunlight hours, and access for pruning when defining the system.
Integration with building services—irrigation lines, drainage, and wall anchors—is essential for durability and safety. Professionals often recommend a membrane or backing to protect façades from moisture. Early coordination avoids retrofitting problems and ensures the living wall performs as both an aesthetic and functional element.
- Support structures: panels, trays, pockets, and frames
- Growing media: soil mixes, felt, hydroponic substrates
- Irrigation components: drip lines, automated controllers, reservoirs
- Plant palette: drought-tolerant vs. moisture-loving species
- Maintenance access: removable modules or front-serviceability
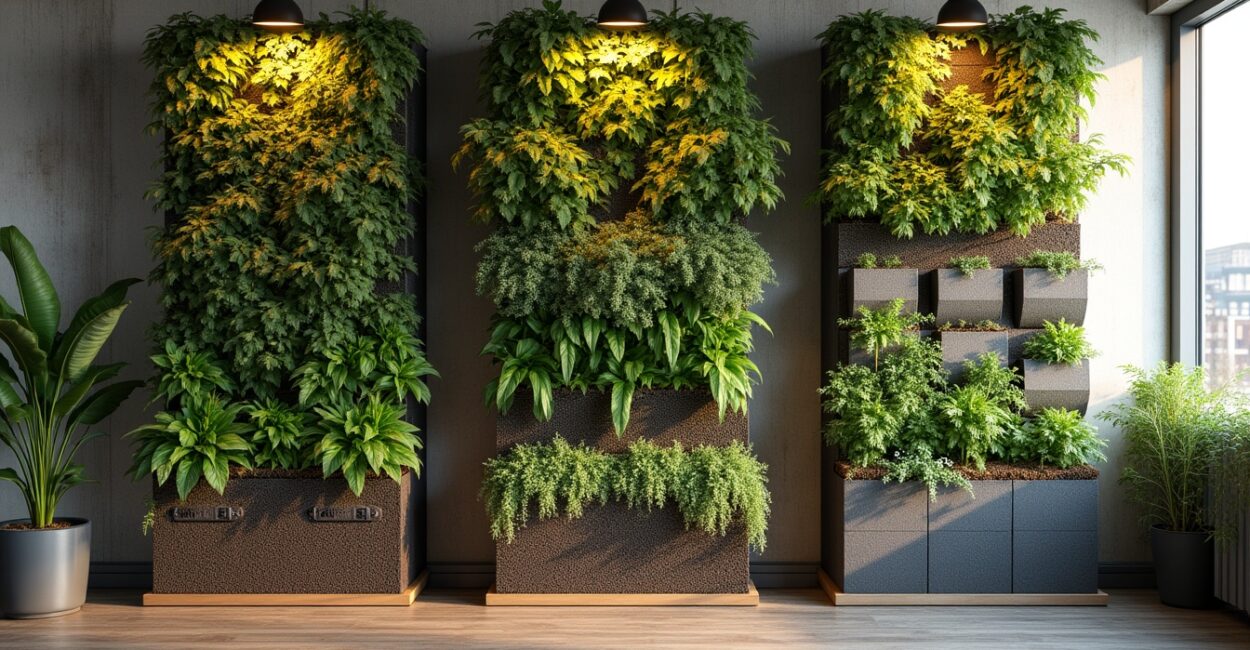
Types of living walls: modular, felt, and tray systems
Modular systems use pre-planted panels snapped into a frame for rapid installation and easy replacement. They suit commercial façades or rental spaces where speed and serviceability are priorities. Felt systems—comprised of vertical fabric pockets—are flexible and lightweight, often used indoors where substrate depth is limited and aesthetics favor soft textures.
Tray-based frames provide deeper substrate and better root volume, ideal for larger shrubs or mixed compositions. They accommodate varied plant heights and more robust irrigation. Each system has trade-offs: modular panels simplify planting runs, felt is budget-friendly but can dry quickly, and trays increase longevity at higher cost and weight.
Select based on exposure, budget, and plant ambitions: use felt for light indoor displays, modular panels for medium-weight green façades, and tray systems for more permanent, biodiverse installations. Combining types on a single project is possible to create texture contrasts and functional zones.
Environmental and aesthetic functions of green walls
Living walls serve functional goals—thermal regulation, noise reduction, air purification—while delivering visual impact. Green façades can lower surrounding air temperatures by up to 4°C through shading and evapotranspiration, improving microclimates in urban settings. Aesthetically, they act as focal points, soften hardscapes, and provide seasonal interest when mixing evergreen and flowering species.
Biophilic design research indicates increased occupant wellbeing and productivity in spaces with visible greenery. Living walls also support biodiversity by providing habitat for insects and birds in dense urban areas. Consider plant communities that bloom at staggered times to extend ecological and visual benefits across seasons.
When designing, balance dense planting for impact with access paths for maintenance. Use contrasting foliage shapes, variegation, and vertical patterning to guide sightlines and create depth, ensuring the living wall performs both environmentally and visually over time.
Vertical garden installation steps and planning
Site evaluation and initial measurements
Begin by assessing sunlight exposure, load-bearing capacity, wind exposure, and nearby irrigation. Measure wall dimensions precisely, noting obstructions like windows or vents. This early evaluation informs plant choices and structural needs, preventing costly mid-project changes and ensuring longevity of the living wall system.
Estimate water source proximity and drainage paths. Indoor installations require overflow protection and waterproof backings, while outdoor walls must account for freeze-thaw cycles. A thorough site survey reduces surprises during install and clarifies whether you need a freestanding frame or anchored solution.
Document the conditions with photos and light readings at different times of day. For larger projects, consult a structural engineer about dead and live loads and engage an irrigation specialist to size pumps and controllers based on measured flow and pressure.
- Determine site constraints and take accurate wall measurements.
- Choose a suitable system (felt, modular, tray) based on load and access.
- Specify irrigation and drainage, sizing pumps if needed.
- Select plant palette matched to light and microclimate.
- Install support frame, mounting panels, and automated irrigation.
- Plant and program irrigation; monitor weekly for 8–12 weeks.
Designing plant palettes and irrigation plans
Select plants by microclimate: shade-tolerant ferns and philodendrons for low light, succulents and sedums for sunny façades, and mixed perennials for transitional aspects. Consider root depth, growth habit, and maintenance frequency to avoid overgrowth and shading issues. Group species with similar water needs to simplify irrigation scheduling and improve resilience.
Irrigation design should include filtration, pressure regulation, a timer/controller, and fail-safe drainage. Automated systems reduce labor and maintain consistent moisture. For smaller installations, manual drip emitters work but require frequent checks; larger walls benefit from sensors that adjust runtime based on soil moisture or weather.
Plan for seasonal adjustments and fertilization access. Use slow-release fertilizers for longer intervals between services and include a flush cycle to prevent salt buildup. Clear documentation of irrigation zones and plant groupings helps with future maintenance and replacements.
Comparisons of living wall systems and methods
Comparing hydroponic, soil-based, and felt vertical gardens
Hydroponic systems circulate nutrient solutions and often allow for denser plantings with reduced substrate weight. They deliver precise feeding but require electrical and plumbing reliability. Soil-based pockets offer buffering against drought and are more forgiving but increase weight and risk of pests. Felt systems are lightweight and low-cost but can dry unevenly and wear faster.
Hydroponics tend to have faster plant growth and less substrate-related decomposition, improving longevity for high-end installations. Soil pockets improve biodiversity and are easier for DIY gardeners. Felt panels are ideal for short-term displays or budget-conscious projects with light planting.
Selection is driven by maintenance capacity, structural limits, and aesthetic goals. For permanent, high-performance façades, hydroponic or tray systems are preferred. For flexible or temporary interior walls, felt or modular soil panels often provide the best balance of cost and visual effect.
| System | Weight | Maintenance Level |
|---|---|---|
| Hydroponic | Low to medium | High (monitoring pumps & nutrients) |
| Soil-based trays | High | Medium (pruning, substrate refresh) |
| Felt panels | Low | Medium-High (frequent watering) |
| Modular panels | Medium | Low (easy swap-outs) |
Costing and lifecycle comparisons
Initial costs vary widely: simple felt walls can start around $50–$150 per square meter (DIY), while engineered hydroponic façades commonly range from $250–$1,000+ per square meter installed. According to a market analysis by Green Infrastructure, average installed costs for commercial living walls often sit near $350/m² for mid-range systems, with maintenance budgets of 2–5% of installation per year.
Lifecycle considerations include substrate replacement, pump replacement, and periodic replanting. Hydroponic systems may require pump and sensor replacement every 5–7 years, whereas soil-based modules need substrate refreshes every 3–6 years depending on decomposition and compaction.
Factor long-term savings from energy reductions and potential increases in property value when calculating lifecycle ROI. For commercial installs, measurable benefits like reduced HVAC loads can offset part of operational costs over 5–10 years.
Benefits and advantages of green vertical systems
Environmental and health advantages
Living walls provide tangible environmental benefits: they filter airborne particulates, improve humidity control indoors, and contribute to urban cooling. According to the World Green Infrastructure Network, green façades can reduce building surface temperatures by up to 20–25% under direct sun, lowering cooling loads. Biophilic exposure also correlates with lower stress and improved cognitive performance for occupants.
These systems capture dust and can improve indoor air quality by removing VOCs when using appropriate plant species. They also create microhabitats for pollinators and beneficial insects in urban zones, supporting local biodiversity and contributing to ecological connectivity.
Designers should match plant species to pollutant-targeting goals—certain plants are more effective at VOC uptake—while ensuring proper maintenance to prevent pest or path issues that would negate health advantages over time.
- Improved air quality and humidity regulation
- Thermal insulation and urban heat mitigation
- Enhanced biodiversity and habitat creation
- Acoustic dampening and noise reduction
- Biophilic benefits for occupant wellbeing
- Potential increase in property attractiveness and value
Commercial and residential value propositions
For commercial tenants, living walls act as marketing assets and can support sustainability certifications like LEED or BREEAM. They can improve employee wellbeing and customer perception, often translating to higher engagement and foot traffic. Residential buyers appreciate living walls for aesthetic differentiation, potential energy savings, and the sense of connection to nature in compact urban homes.
Installation scale and system choice determine payback timelines: small interior walls show quick returns in wellbeing metrics, while façade-scale projects require longer financial horizons but yield significant energy and environmental benefits. Integrating a living wall into a broader sustainability plan amplifies its value.
When proposing living walls to stakeholders, present quantified benefits—projected energy savings, maintenance costs, and increased rental or resale value—to make a compelling, evidence-based case that aligns with business or lifestyle goals.
Technical considerations and limitations of living walls
Structural and weight constraints
Load-bearing considerations are critical: saturated soil pockets can weigh 40–100 kg/m² depending on substrate depth, while hydroponic systems typically weigh less, around 15–35 kg/m². Always consult a structural engineer for wall-mounted façades to confirm anchors, reinforcing, and any need for freestanding supports to manage wind loads and live loads from maintenance.
For retrofit projects, lighter systems or freestanding frames may avoid costly wall reinforcement. Balancing substrate depth for plant health against structural capability is a common trade-off; designers sometimes select cascading plantings with shallower pockets near the top of a wall to reduce load.
Documenting dead loads, live loads, and safety factors during planning reduces risk. Regular inspections of anchors and frames—at least annually—catch corrosion or fatigue before failures occur.
- Possible increased moisture exposure to walls without proper backings
- Higher upfront costs for engineered systems and pumps
- Need for routine maintenance and plant replacements
- Seasonal irrigation adjustments and freeze protection
Irrigation, drainage, and long-term maintenance challenges
Proper irrigation and drainage are the backbone of a healthy living wall. Overwatering leads to root rot and structural damage; under-watering causes plant decline. Automated systems with timers or moisture sensors reduce human error, but require filtration and occasional flushing to prevent clogging and mineral buildup. For outdoor walls, design for heavy-rain overflow and winter shut-down protocols.
Maintenance demands include pruning, pest control, nutrient dosing, and module replacement. Plan a maintenance schedule: weekly checks during establishment (8–12 weeks), then biweekly to monthly thereafter depending on plant choices and system automation. Contracts for commercial projects often allocate 2–5% of installation cost annually for routine upkeep.
Document maintenance access routes and provide clear operation manuals for building managers. Training for on-site staff reduces reactive interventions and prolongs the living wall’s aesthetic and functional performance.
Materials, plant selections, and performance strategies
Choosing plants for light, climate, and exposure
Select species by matching light levels and exposure: low-light interiors favor ferns, Pothos (Epipremnum aureum), and philodendrons, while sunny façades perform well with sedums, echeverias, and drought-tolerant grasses. For transitional or mixed light, use a combination of perennials, climbers, and compact shrubs to create depth and visual layering.
Consider cold-hardiness for outdoor walls and frost-sensitive species for temperate zones. Use native plants where possible to support local pollinators and increase resilience. Group plants by water needs into irrigation zones to simplify scheduling and reduce competition for resources.
Rotate seasonal accents—bulbs, flowering perennials, or climbers—to maintain interest across the year. Maintain a species inventory and replacement plan to respond quickly to plant losses and keep the living wall visually balanced.
Materials and finishes for longevity and aesthetics
Use corrosion-resistant metals (stainless steel or powder-coated aluminum), rot-proof plastics, and UV-stable fabrics for frames and panels to ensure long life. Backing membranes protect masonry and wood from moisture; choose breathable membranes that allow drainage while preventing seepage. For interior installations, select non-toxic finishes and ensure materials meet fire-safety codes.
Aesthetic finishes—natural wood-look panels, textured metals, or coloured frames—help integrate the living wall into interior or exterior design schemes. Consider hidden irrigation lines and integrated lighting to highlight foliage and extend visual impact after dark. Low-gloss finishes reduce glare and emphasize plant textures.
Specifying warranties and maintenance agreements for mechanical components (pumps, valves) ensures predictable performance. Keep spare modules and replacement plants on hand to reduce downtime after damage or seasonal decline.
| Characteristic | Recommended Materials | Notes |
|---|---|---|
| Frame | Stainless steel, aluminum | Corrosion-resistant for outdoor use |
| Backing | Waterproof breathable membrane | Protects substrate and wall |
| Panels | Modular trays, felt pockets | Choose based on weight and access |
| Irrigation | Drip lines, controllers, filters | Include fail-safes and sensors |
Practical tips, troubleshooting, and best practices
Installation best practices and timing
Install in mild weather when possible to reduce plant shock and evaporation stress. Sequence work: mount frame, attach irrigation and drainage, test water flow, then install modules and plant. Allow for an establishment period of 8–12 weeks with more frequent inspections to catch irrigation imbalances and transplant stress early.
Use anchor points rated above calculated loads and incorporate redundancy in mounting hardware. Stagger planting by zones to reduce simultaneous stress on the irrigation system and to allow technicians to monitor gradual plant establishment. Include clear labeling of irrigation zones and emergency shut-offs for service workers.
Document the as-built configuration—plant map, irrigation layout, and component spec sheets—to streamline ongoing maintenance and future upgrades. A digital checklist helps ensure consistent servicing and record-keeping for warranty claims.
- Schedule installation in spring or fall for best plant establishment
- Test irrigation thoroughly before planting
- Provide clear maintenance manuals and labeling
- Monitor weekly for first 8–12 weeks, then adjust schedule
- Keep spare plants and modules for quick replacements
- Track water and energy savings to quantify benefits
Common problems and how to diagnose them
Yellowing leaves often indicate nutrient deficiencies or overwatering; inspect for clogged emitters or poor drainage. Browning leaf margins suggest underwatering or salt accumulation—flush substrate and check irrigation coverage. Pests such as aphids or spider mites appear in stressed plants; use integrated pest management (IPM) with beneficial insects and targeted treatments to reduce chemical use.
Uneven growth patterns generally result from light variability or blocked drip lines. Address by adjusting plant placement, pruning, or rebalancing irrigation zones. For structural concerns—loose anchors or warped panels—stop loading the system and inspect for corrosion or anchor failure, consulting a structural engineer if needed.
Keep a troubleshooting log to capture recurring issues and resolutions. Regular maintenance, monitoring sensors, and an annual professional inspection significantly reduce failure rates and prolong attraction and functionality of the living wall.
Conclusion
Living wall projects combine design, horticulture, and engineering to deliver striking vertical gardens that improve environments and wellbeing. By matching system type to site constraints, selecting suitable plants, and planning robust irrigation and maintenance, you can achieve durable and high-performance living walls. This guide covered methods, costs, benefits, and practical tips for selecting styles, plants, and materials for vertical aesthetics.
Start with a site assessment, choose a system that aligns with structural capacity and maintenance resources, and pilot a small panel if uncertain—then scale with confidence. Embrace a living wall to transform a flat surface into a thriving, functional green asset.
Frequently Asked Questions
What is a living wall?
A living wall is a planted vertical structure that integrates plants into a vertical plane using modular panels, felt pockets, or tray systems. It combines a support frame, growing medium, irrigation, and drainage to sustain plants on walls or freestanding structures. Living walls enhance aesthetics, improve air quality, and can provide thermal and acoustic benefits, making them popular in both interior and exterior environments.
How does living wall irrigation work?
Irrigation for living walls commonly uses drip or recirculating hydroponic systems with filters, pressure regulators, and controllers. Water is delivered evenly to modules, excess drains away safely, and automated controllers schedule runtimes. Sensors (moisture or flow) can adjust watering to conditions. Proper filtration and periodic flushing prevent clogs, while zoning groups plants with similar needs to simplify management and maintain healthy growth.
What is the difference between modular panels and felt systems?
Modular panels are rigid, pre-planted units offering quick installation and easy replacement; they usually carry medium weight and provide good root volume. Felt systems use fabric pockets that are lightweight and flexible, suitable for interiors or budget builds but often require more frequent watering and wear faster. The main differences are weight, serviceability, substrate depth, and longevity, with modular panels favored for permanence.
When should I choose a hydroponic method for a living wall?
Choose hydroponic systems when weight constraints, precise nutrient control, and faster plant growth are priorities—common in large façades or installations where substrate weight must be minimized. Hydroponics suit projects with reliable power/water access and trained maintenance, offering efficient water use and reduced substrate decomposition. For low-maintenance or retrofits, soil-based modules may be more forgiving.
How much does a living wall cost to install and maintain?
Costs vary: DIY felt walls can start near $50–$150 per m²; professionally installed systems typically range from $250–$1,000+ per m² depending on system type and scale. Maintenance commonly runs 2–5% of install cost annually, covering pruning, irrigation servicing, and plant replacements. According to Green Infrastructure reports, commercial mid-range installs average ~$350/m² with maintenance budgets reflecting system complexity.
Sources: World Green Infrastructure Network, industry reports, and market analyses by Green Infrastructure studies. For technical standards and structural guidance consult local building codes and a licensed structural engineer.


