


Warning: Cannot modify header information - headers already sent in /home/u278635817/domains/myhousegarden.com/public_html/wp-content/plugins/artigosgpt/artigosgpt.php on line 28454
Brighten your cooking zone without blowing your budget: budget kitchen counter lighting hacks turn tired counters into purposeful, mood-setting spaces using cheap LED strips, battery puck lights, and thrifted pendants. These clever fixes deliver task lighting, ambient glow, and style on a shoestring.
With energy concerns and DIY popularity rising, knowing how to use adhesive LEDs, under-cabinet options, IKEA finds, and secondhand pendant lights matters more than ever. This guide shows affordable wiring alternatives, battery solutions, and styling tips to make countertops shine.
Read on to discover quick installs, cost comparisons, a featured step-by-step upgrade, and thrift-savvy sourcing so you can transform your kitchen with practical budget kitchen counter lighting hacks.
Smart starter upgrades: quick wins for countertop illumination
Low-cost under-cabinet swaps
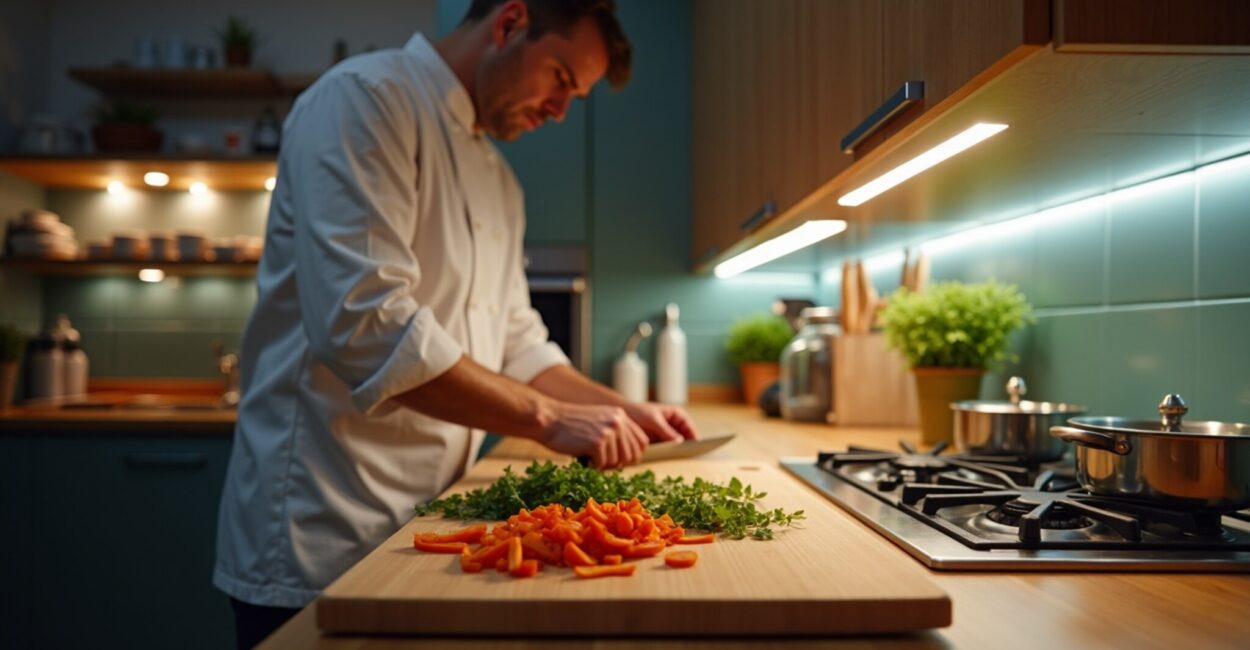
Swap dated fixtures for adhesive LED strips, battery puck lights, or thin hardwired bars to improve task lighting and reduce shadows. Choose warm or cool color temperatures for cooking or prep.
These under-cabinet lighting upgrades can be surface-mounted, use dimmers, and integrate with smart bulbs for energy-efficient control and timed routines.
Where to place lights for best effect
Position lights near the front of cabinets to reduce glare and illuminate the work surface evenly. Focus on food prep zones and stove areas for safety and clarity.
Combine task lighting with ambient strips or a pendant over an island to layer light, creating depth and a welcoming atmosphere without rewiring the whole space.
Battery and adhesive solutions that actually work
Puck lights and adhesive LED strips: pros and cons
Battery puck lights are portable and easy to install, ideal for renters. Adhesive LED strips offer continuous light and come in various CRI ratings for true color rendering.
Consider battery life, brightness (lumens), and adhesive quality. Some strips are USB-rechargeable, marrying convenience with low operating cost.
Maintenance and replacement tips
Replace batteries proactively and clean surfaces before sticking adhesive strips. Rotate rechargeable packs and keep spare LED modules to avoid dark spots on the countertop.
Check IP ratings for moisture-prone areas and choose dimmable puck lights for flexible mood control when preparing food or hosting.
- Choose rechargeable over single-use batteries where possible
- Carry spare adhesive tabs for future re-mounting
- Match light temperature to existing kitchen tones
Thrifted pendants and IKEA steals: style on a budget
Hunting secondhand treasures
Visit thrift shops, flea markets, and online marketplaces for pendant finds. Often, a simple rewire and new shade make a statement over islands or breakfast bars.
IKEA fixtures frequently appear used at low cost; swap bulbs for higher-CRI LEDs and replace worn cords to match modern safety standards and aesthetics.
Refinishing and customizing fixtures
Spray paint, new chains, or cloth-wrapped cords can modernize vintage pendants. Swap dated glass shades for opal or frosted options to soften light and reduce glare.
When adapting a secondhand fixture, test wiring and use a certified electrician for hardwired installations to maintain compliance and safety.
DIY wiring, safety, and energy-efficient choices
Basic wiring tips for confident DIYers
Turn off power, use a voltage tester, and follow local codes. Hardwiring under-cabinet bars calls for secure mounting and proper connectors to avoid loose joints or shorts.
If unsure, hire a licensed electrician. Small mistakes can be costly; permit-free changes vary by location, so verify regulations before work begins.
Pick energy-efficient components
Choose LEDs with high lumens per watt and 2700K–3000K for warm, flattering light. Smart dimmers and motion sensors further cut energy use during low-traffic hours.
Check Energy Star recommendations and consider wattage equivalents to calculate savings over years versus incandescent or halogen bulbs.
- Turn off circuit power at the breaker before starting any wiring.
- Measure and mark exact light placement on the underside of cabinets.
- Secure fixtures with proper anchors and strain-relief for cords.
- Connect wires with wire nuts and test with a voltage tester.
- Restore power and test dimmers or smart controls for correct operation.
Lighting design: balance task, ambient, and accent light
Layering light for functional beauty
Start with task lighting for prep areas, add ambient strips for overall warmth, and finish with accents to highlight backsplashes or countertop textures. Contrast creates depth.
Use directional under-cabinet strips for chopping zones and softer sources for eating spaces. Accent LEDs can emphasize tile grout or decorative items.
Choosing color temperature and CRI
Select a consistent color temperature to avoid mismatched tones; aim for CRI 90+ where food appearance matters. Cooler light improves clarity, warmer light enhances comfort.
Test sample strips in natural daylight and at night to ensure the chosen fixtures flatter surfaces and materials used on your countertops and cabinets.
Cost breakdown: save money with smart choices
Compare upfront and long-term costs
Battery puck lights are cheapest upfront, while hardwired LED bars cost more to install but save energy long-term. Factor bulb lifespan and electricity rates when choosing fixtures.
Thrifted pendants offer dramatic savings versus new designer fixtures. Replacing bulbs with efficient LEDs reduces operating costs and maintenance cycles.
Table: typical costs and lifespan
| Option | Typical Cost | Expected Lifespan |
|---|---|---|
| Battery puck lights | $10–$30 each | 6–24 months (batteries vary) |
| Adhesive LED strip | $15–$50 per 5m | 3–7 years |
| Hardwired LED bar | $40–$150 | 5–10 years |
| Thrifted pendant (refurbished) | $10–$80 | Varies with rewiring |
Installation hacks and final styling tips
Conceal wiring and improve finishes
Use raceways, cable clips, and paintable cord covers to hide wiring along backsplash lines. Ensure cords remain accessible for maintenance and battery changes.
Add vinyl light diffusers or frosted tapes to spread light evenly and avoid hot spots from LEDs, creating a polished, professional look.
Make a design statement on a budget
Pair warm wooden countertops with warm LEDs, or contrast cool quartz with crisp white light. Small decorative touches like colored cords or vintage bulbs add personality inexpensively.
Experiment with dimming scenes: bright for prep, mellow for dining. These simple adjustments amplify mood and function, proving budget kitchen counter lighting hacks can feel luxurious.
Conclusion
Budget kitchen counter lighting hacks prove you don’t need expensive fixtures to transform a kitchen. From battery puck lights to adhesive LED strips and thrifted pendants, small investments and smart placement create big emotional payoff—safer prep, inviting ambience, and stylish surfaces.
Reconnect with the initial urge to brighten your counters: apply one cheap swap today, and enjoy a renewed cooking space that looks expensive but cost very little.
Frequently Asked Questions
How long do adhesive LED strips typically last under kitchen cabinets?
Adhesive LED strips usually last between three and seven years, depending on quality, heat exposure, and installation. Higher-quality strips with proper heat dissipation and aluminum channels extend lifespan. Clean, dry surfaces before sticking and avoid direct high-heat exposure from cooktops. Using dimmers and avoiding maximum brightness constantly can also prolong LED life and maintain consistent color rendering over time.
Are battery puck lights bright enough for food prep tasks?
Battery puck lights can provide adequate task lighting for small prep areas but often lack the continuous, even illumination of adhesive strips or hardwired bars. For detailed chopping or baking, choose higher-lumen puck models or place multiple units strategically. Consider rechargeable puck lights with higher lumen output and diffusers to avoid harsh hotspots that can cast confusing shadows during food preparation.
Can I safely rewire a thrifted pendant lamp for kitchen use?
You can rewire a thrifted pendant safely if you inspect the fixture for damage, replace frayed cords, and install a new socket rated for kitchen use. Use heat-resistant wiring and ensure the fixture meets local electrical codes. If the pendant will be hardwired, hire a licensed electrician to handle mounting and junction connections to guarantee safety and code compliance, especially near moisture or over cooking zones.
What color temperature is best for kitchen counter lighting?
The best color temperature for kitchen counters is typically 2700K–3000K for warm, flattering light or 3500K–4000K for a neutral, task-oriented feel. High-CRI LEDs (90+) render food colors more accurately, important for cooking and presentation. Match color temperature across fixtures to avoid conflicting tones, and use dimming to shift between bright prep light and cozy ambient settings for meals.
Where can I find reliable, low-cost lighting parts and inspiration?
Reliable low-cost parts are available from major retailers and specialty lighting shops; IKEA offers budget-friendly fixtures and DIY components, while online marketplaces host adhesive strips and puck lights. For safety and efficiency information, consult Energy.gov resources and product reviews on Wirecutter. Always check product specifications, CRI, and return policies before buying, and inspect secondhand fixtures before installation.
External resources: IKEA lighting, U.S. Department of Energy, and Wirecutter reviews.


