


Warning: Cannot modify header information - headers already sent in /home/u278635817/domains/myhousegarden.com/public_html/wp-content/plugins/artigosgpt/artigosgpt.php on line 28454
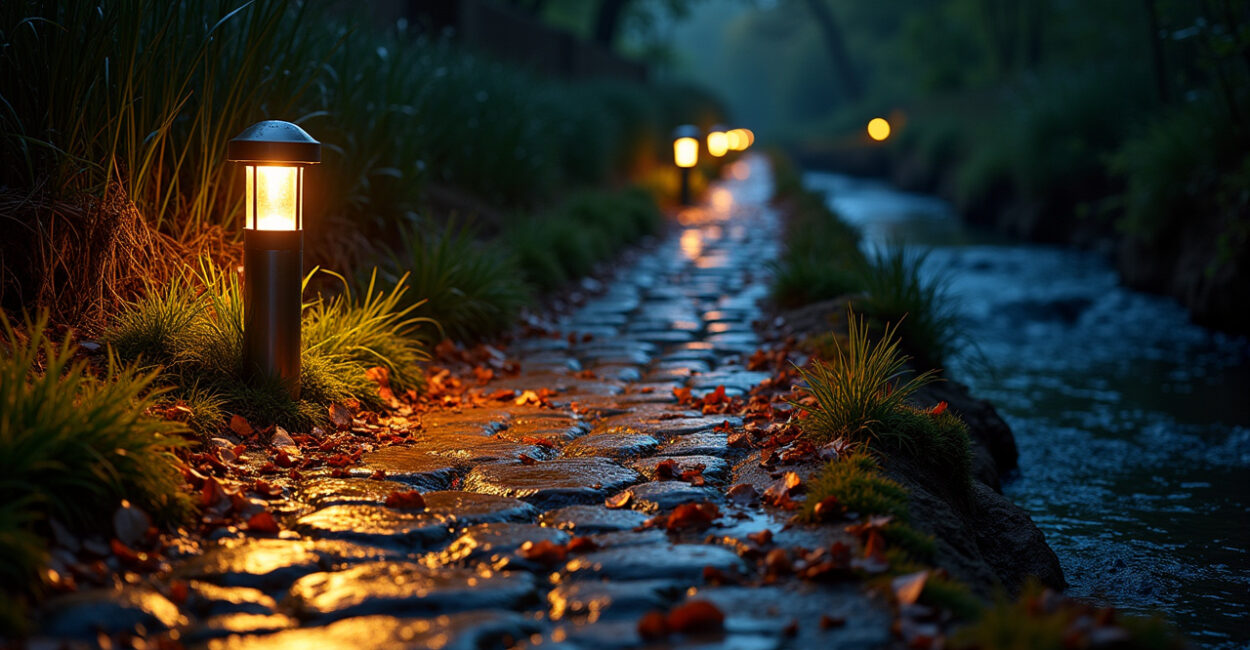
The moon hit the water and everything else vanished—except for a thin ribbon of light along the bank that didn’t scare the frogs or wash out the stars. That’s the kind of creekside lighting that feels like skill, not decoration. It guides your path, frames the water, and keeps the ecosystem intact.
If you want to light the water’s edge without wrecking habitat or triggering erosion, these six practical, eco-first techniques will change how you design the bank. Read the quick wins up front, then the how-to details.
1. Start with the Single Change That Pays Off Most
Cut glare, keep contrast. For creekside lighting, the biggest win is lowering brightness and using shields. Bright, unshielded lights wash out the stream, spook insects, and attract predators. Swap one overhead fixture for a low-mounted, downward-shielded luminaire and you’ll instantly reduce light spill and disturbance.
- Use full cutoff fixtures aimed at the bank, not the water.
- Prefer low lumen counts—think 200 lm or less for path zones.
- Layer a single path light with targeted uplights for features you actually want seen.
2. Where to Place Lights So the Bank Stays Put (and Plants Survive)
Placement determines whether creekside lighting helps or causes erosion. Lights set too close to the water encourage foot traffic and trampling; too high and they overheat the bank’s soil structure.
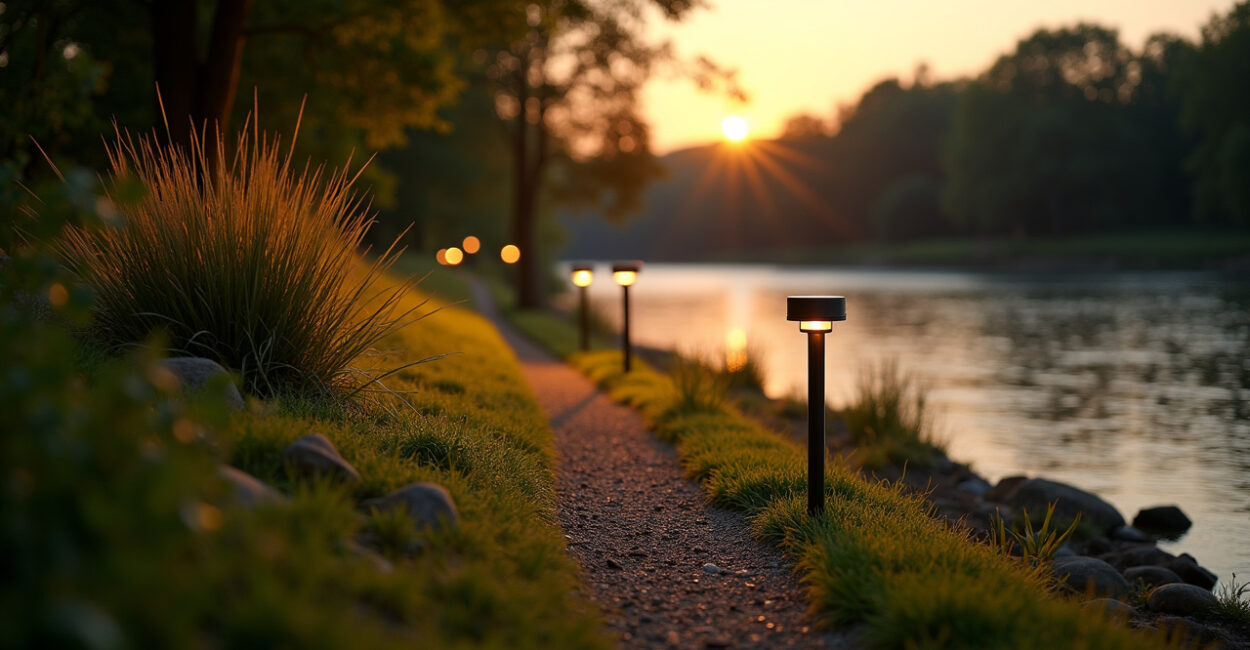
Place fixtures behind natural vegetation or at the top edge of slopes, not on the slope face. That keeps root systems intact and reduces concentrated runoff paths. Group lights in short clusters rather than a continuous line—this guides people while leaving most of the bank in darkness, which preserves plant growth and reduces erosion.
3. Low-glare Options That Wildlife Won’t Hate
Color and glare matter more than you think. Warm color temperatures (2200–2700K) and amber LEDs cut insect attraction and disturb fewer nocturnal animals. For creekside lighting, choose narrow-beam, shielded fixtures to keep light off the water.
- Amber LEDs or filtered warm white for paths.
- Shielded, full-cutoff fixtures to prevent skyglow.
- Motion-sensors on secondary lights so they only trigger when needed.
Comparison: A standard 4000K floodlight will light a creek like daytime and push away moths and bats. A 2200K, 200 lm, shielded fixture will reveal the path and keep insects and predators behaving normally. Expect different results—daytime vs. night-friendly ecology.
4. Solar and Hybrid Systems That Actually Work by the Water
Solar isn’t a gimmick by the creek, but it needs designing. Direct-install, low-efficiency solar lanterns die under tree canopy. For reliable creekside lighting, use panel-plus-battery systems sited in sun pockets or hybrid mains/battery fixtures that charge during the day and dim at night.
- Mount panels on poles angled to capture peak sun.
- Use LiFePO4 batteries for longer life and better cold performance.
- Program dimming curves to reduce output after midnight.
Mini-story: We swapped twelve cheap solar spikes for four panel-fed, low-glare fixtures on one creek. First month: consistent light, no dead cells, and a calm heron that returned to the same hunting spot—proof that good design beats cheap scattergun installs.
5. Install Methods That Prevent Erosion and Simplify Maintenance
How you mount lights can save the bank. Concrete pads and heavy posts concentrate runoff and create scouring. Instead, use wide-base, helical anchors, flexible mounts, or rebar sleeves set back from the bank. These spread load, let plants grow around fixtures, and reduce direct soil disturbance.
- Use permeable gravel pads instead of poured concrete.
- Route wiring overhead on low-profile arms or in shallow, gravel-filled trenches away from root zones.
- Design fixtures for tool-free removal so you can take lights out seasonally if needed.
6. Meet Night-sky and Conservation Concerns (what Regulators and Neighbors Actually Want)
Conservation-minded creekside lighting respects dark-sky principles and local wildlife ordinances. Use warm tones, shielded fixtures, and timers. Night-sky friendly setups cut skyglow and often require less maintenance. Many municipalities reference best practices—so align early to avoid retrofits.
For science-based guidance, consider resources like the U.S. Fish & Wildlife Service on light impacts (U.S. Fish & Wildlife Service) and dark-sky standards at the International Dark-Sky Association. Also check local state environmental pages for riparian setback rules—these can affect fixture placement and trenching.
7. Common Mistakes to Avoid and the Checklist to Get It Right
People often do three things wrong:
- Overlighting with high kelvin, high lumen fixtures.
- Mounting in the wrong spot—on the slope face or too near root systems.
- Using cheap solar spikes under canopy that die after one season.
Quick checklist to ship a project: pick warm 2200–2700K fixtures, use shielded optics, site lights behind vegetation, favor clustered low-lumen placement, choose panels/batteries sized for local sun, and add dusk-to-dawn dimming. Follow those steps and your creekside lighting will look intentional, not invasive.
For official design guidance and studies on light and wildlife, read the National Park Service recommendations on outdoor lighting and the NPS outdoor lighting page, and the U.S. Fish & Wildlife Service materials linked above.
Lighting a creek bank well means choosing subtlety over spectacle. Do that, and the night keeps its depth while your path keeps its safety.
Impactful Next Move
Before buying fixtures, walk the bank at night with a flashlight. Map where you need light, where you don’t, and where plants already protect the bank. A 30-minute walk will save money, wildlife, and your sanity.
How Do I Choose the Right Color Temperature for Creekside Lighting?
Choose warm color temperatures between 2200K and 2700K to reduce insect attraction and minimize disturbance to nocturnal species. Warmer light preserves natural contrast and keeps light from appearing “daylike” to animals. Avoid cool white or high-CCT LEDs (3000K+) near water. If you need task lighting for access points, use warm lights with shields and brief motion activation rather than constant bright output to limit ecological impact and energy use.
Can Solar Lights Really Last Near a Tree-lined Creek?
Solar lights can work, but placement and battery choice matter. Avoid cheap spike lights under heavy canopy. Instead, mount panels in full-sun pockets or use hybrid systems that combine a solar panel with larger batteries like LiFePO4. Panels should face unobstructed sun for peak hours. Properly sized panels and batteries with a dimming schedule will reliably power low-wattage creekside lighting through the night without frequent replacement or dead cells.
Will Lighting Increase Erosion Along My Creek Bank?
Light itself doesn’t cause erosion, but poor fixture placement and hardscape mounts can. Installing poles or pads on slope faces concentrates runoff and foot traffic. Use wide-base anchors or helical piles set back from the bank edge, and route wiring away from root systems. Encourage people to stay on a lit path rather than trampling the bank by clustering lights and keeping most vegetation in relative darkness to protect root structure and soil stability.
How Do I Keep Wildlife from Being Disturbed by My Outdoor Lights?
Minimize impact by choosing low-lumen, shielded fixtures with warm color temperatures and by directing light only where needed. Use motion sensors on non-essential fixtures and dim lights after midnight. Avoid uplighting that silhouettes trees and attracts insects. If you live near sensitive species, consult local wildlife guidelines and consider seasonal removal or reduced hours during breeding and migration periods to reduce disturbance and allow animals to use the habitat naturally.
Do I Need Permits or Approvals to Install Creekside Lighting?
Possibly. Regulations vary by state and municipality, especially in riparian zones or protected areas. Some jurisdictions require setbacks, trenching permits, or lighting plans that meet dark-sky and conservation standards. Early contact with local planning or environmental authorities can reveal required permits and avoid costly retrofits. If the creek is within a protected watershed or near wetlands, expect stricter rules and plan for compliance to protect both the habitat and your investment.


