

Low-Cost House Landscaping Ideas: 15 Budget-Friendly Upgrades
How to boost curb appeal quickly with budget landscaping by removing clutter, using mulch and edging, choosing native plants, and focusing on simple layouts …
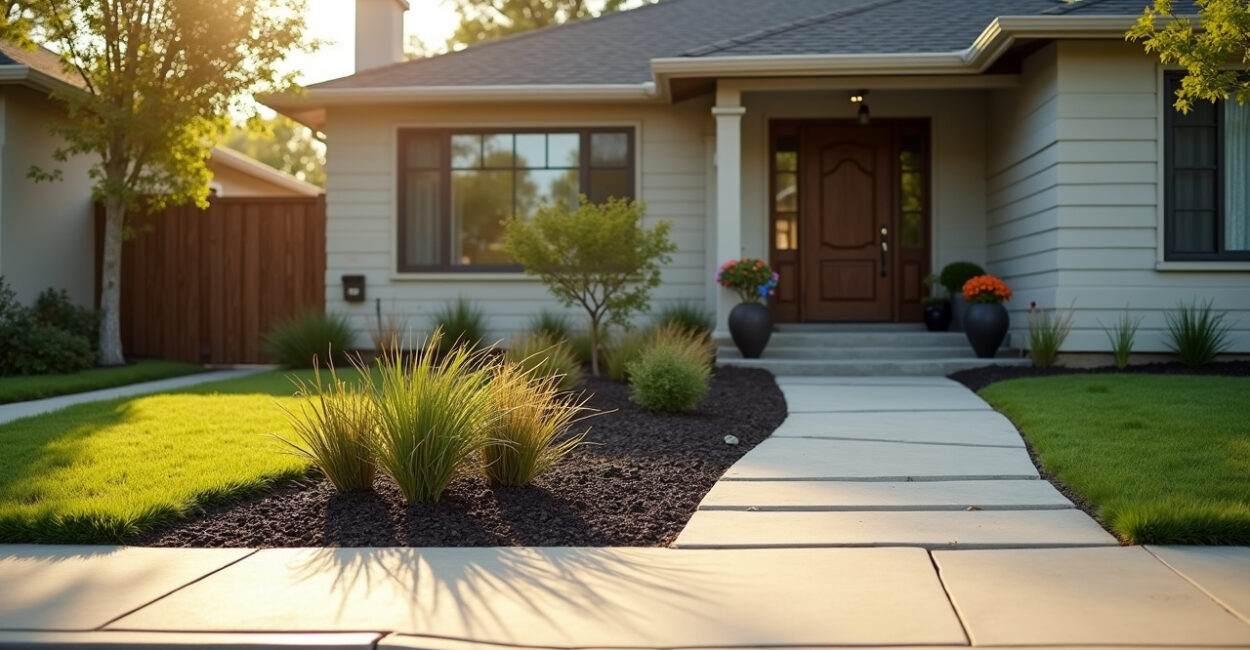
Small landscaping changes can raise curb appeal faster than most interior updates, and they usually cost less than a single exterior remodel. The real value of low-cost house landscaping ideas is that they focus on visible impact: cleaner lines, better plant placement, and materials that look intentional without looking expensive.
In practice, the strongest budget landscapes are not packed with features. They are built around a simple layout, a few durable plants, and one or two focal points that make the whole yard feel finished. This guide breaks down where to spend, where to save, and which upgrades actually change how a home reads from the street.
What You Need to Know
- A budget landscape works best when it removes visual clutter before adding new features.
- Mulch, edging, native plants, and a narrow color palette usually deliver the best return per dollar.
- The cheapest-looking yards are often the ones with too many plant types, not too few.
- Drainage and sunlight matter more than trends; a cheap plant in the wrong place becomes a repeat expense.
- Most curb appeal gains come from finishing details such as borders, cleanup, and symmetry.
Low-Cost House Landscaping Ideas That Improve Curb Appeal Fast
When people ask for budget-friendly landscaping, they usually mean one thing: “What changes will people notice right away?” The answer is rarely a big lawn renovation. It is usually a mix of cleanup, structure, and a few small upgrades that make the front yard feel deliberate.
The formal definition of landscaping is the planned modification of outdoor space through grading, planting, hardscape, and maintenance. In plain English, it is how you make the yard look organized, healthy, and connected to the house. That means the cheapest wins are often the simplest ones: define a border, reduce empty-looking patches, and repeat a few elements so the eye stops wandering.
Start with the Parts People See First
The front walk, the entry bed, the mailbox area, and the strip along the driveway usually set the tone. If those zones look tidy, the whole property feels better, even if the side yard is still a work in progress. This is why curb appeal professionals often begin with the visible 20 percent of the yard instead of trying to fix everything at once.
What separates a cheap yard from a polished one is not how much money you spend — it is whether every visible edge has a clear purpose.
Use Mulch, Edging, and Gravel to Create Structure on a Budget
Mulch is one of the most cost-effective materials in landscaping because it does three jobs at once: it suppresses weeds, holds moisture, and visually unifies planting beds. Fresh mulch can make an old bed look newly designed even when nothing else changes. For most homes, that alone creates a noticeable before-and-after effect.
Bed edging matters just as much. A clean line between lawn and planting area makes the yard look maintained, even if the plant list is small. Steel edging, plastic edging, pavers, and even a simple spade-cut edge each have different costs and lifespans, but the principle is the same: a crisp boundary creates order.
Where Gravel Helps and Where It Fails
Gravel can be a smart low-maintenance choice for dry areas, side yards, and narrow strips where grass struggles. It is also useful around downspouts or utility areas where you want drainage and a finished look. The limit is that gravel alone can look harsh if it is used everywhere; it needs plants, boulders, or pavers to soften the space.
- Use mulch in planting beds to reduce upkeep and improve visual consistency.
- Use edging to make even a small bed look intentional.
- Use gravel only where it solves a maintenance or drainage problem.
For plant and mulch guidance that reflects regional conditions, the USDA and local extension services are better starting points than trend-based social media advice.

Choose Native Plants and Perennials That Pay Off Year After Year
Plants are where budget landscapes succeed or fail. A plant that thrives in your climate costs less over time than a bargain plant that needs constant replacement, heavy watering, or frequent pruning. That is why native species and hardy perennials usually beat novelty plants in low-cost projects.
Native plants are adapted to local rainfall, temperature swings, and soil conditions. That does not mean every native plant is “low maintenance,” but it does mean the odds are better that it will survive with less intervention. Extension programs from universities such as Penn State Extension regularly recommend choosing plants based on site conditions first, then aesthetics.
Build a Simple Plant Palette
Use repetition. Three to five plant types, repeated in groups, usually look better than a random mix of ten. For example, one evergreen foundation plant, one flowering perennial, one ornamental grass, and one ground cover can cover a lot of visual ground without ballooning costs.
A low-maintenance landscape is usually a repeatable plant system, not a collection of individual plants chosen one by one.
Viable budget-friendly options often include daylilies, ornamental grasses, sedum, boxwood in limited use, and region-appropriate native shrubs. The best choice depends on sun exposure, soil drainage, and mature size. Mature size matters because a plant that outgrows its space becomes a pruning job, and pruning is time you will pay for later.
Reuse Hardscape Materials Instead of Buying Everything New
Hardscape is the nonliving part of the yard: pavers, stepping stones, retaining edges, border rock, and similar materials. This is where reuse can save real money. A stack of leftover pavers, reclaimed brick, or surplus stone from another project can become a border, walkway repair, or small patio accent.
Read also: Mulch Vs. Stone Landscaping on a Budget: Which Works Best?
Read also: DIY Garden Edging on a Budget: Clean Lines for Less
Read also: Low-Maintenance House Exterior Ideas for Easy Curb Appeal
Who works in landscaping knows that “new” is not always “better.” Reclaimed materials often give a property more character than catalog-perfect products, as long as the pieces are structurally sound and laid with care. The trick is to use them in places where imperfection reads as charm, not neglect.
| Material | Best Use | Budget Advantage |
|---|---|---|
| Reclaimed brick | Edging, small walkways | Often cheaper than new pavers |
| Stepping stones | Side paths, garden access | Reduces full-patio costs |
| Border rock | Bed definition, drainage edges | Lasts longer than mulch-only borders |
| Concrete pavers | Entry pads, utility areas | Easy to install in small sections |
One thing to watch: a reused hardscape looks affordable only when the layout is clean. If the line wanders or the base is uneven, the project can end up looking improvised instead of intentional.
Stretch the Budget with Smart DIY Projects
Some of the best low-cost upgrades are labor-heavy, not material-heavy. That is why do-it-yourself projects can create outsized value if you pick the right jobs. Cleanup, weeding, trimming, border installation, and bed reshaping cost little more than time and basic tools.
A small real-world example: one homeowner I worked with spent under $250 on a weekend front-yard refresh. The money went to mulch, a few perennials, edging, and a rental dump run. The biggest visual gain came from removing overgrown shrubs that hid the windows and opening a straight line from the sidewalk to the entry. The house looked bigger the next day, and none of it required a major redesign.
Best DIY Jobs for Beginners
- Pull weeds and redefine bed edges before buying anything new.
- Trim overgrown shrubs so windows and walkways are visible again.
- Lay mulch after the beds are shaped, not before.
- Replace one dead plant at a time instead of redoing the whole bed.
There is a limit, though. DIY saves money when the work is cosmetic or straightforward. It stops saving money when grading, drainage correction, or root removal is involved. Those jobs can fail quietly at first and become expensive later, which is why a low budget should never override basic site conditions.
Save Water and Maintenance Costs with Smarter Layout Choices
A landscape that constantly needs irrigation, mowing, and pruning is not truly low cost. The cheapest yard to maintain is usually the one with fewer thirsty plants, more shade where appropriate, and a layout that matches how people actually use the property. The design decision happens once; the maintenance cost repeats every season.
That is where zoning helps. Group plants by water need. Keep lawn only where it serves a purpose. Use shade trees in places that reduce heat load near the house. If you want a deeper reference on water-wise design, university extensions such as UC Agriculture and Natural Resources publish practical guidance on irrigation and plant selection.
Reduce Lawn Without Making the Yard Look Bare
You do not need to remove every square foot of grass. In many homes, the smartest move is to shrink the lawn into a defined rectangle or path-edged shape and use planting beds to carry the visual load. That lowers mowing time while making the lot feel more structured.
The most expensive landscape is the one that looks inexpensive after a year because it was designed without maintenance in mind.
Use Lighting, Containers, and Color for Small Visual Wins
Not every upgrade needs excavation. A few compact, well-placed changes can shift the way a house feels after dark and from the curb. Solar path lights, a pair of matching containers, or a fresh color accent near the entry can do more than another random plant purchase.
Lighting is especially useful because it adds depth without adding much maintenance. Two or three fixtures aimed at walkways or architectural features are enough for most homes. The goal is not a theme park effect; it is to make the house readable at dusk and safer to approach.
Keep the Color Story Tight
Budget landscapes look more expensive when they obey a simple color rule. Green plus one accent color is usually enough. Too many pot colors, mulch colors, or blooming shades can make a small yard feel busy, even when the materials were affordable.
Containers help fill awkward spaces near steps, porches, or garage corners. They are also a good fix when the ground soil is poor or the bed space is too narrow for proper planting. Just remember that pots dry out faster than in-ground beds, so they can become a watering chore in hot weather.
Plan the Project in the Right Order to Avoid Wasting Money
The order of work matters more than most people realize. If you buy plants before defining beds, or mulch before fixing edge lines, you often end up paying twice. Good landscaping follows the same logic used in construction: shape first, materials second, details last.
Here is the practical sequence that keeps costs down:
- Clean up the yard and remove dead growth.
- Fix the shape of beds and define edges.
- Address drainage, sunlight, and problem spots.
- Install mulch, gravel, or hardscape accents.
- Add plants in repeated groups.
- Finish with lighting, containers, or a focal point.
This method works well for most homes, but it fails when the site has a structural issue like standing water, severe slope, or invasive roots. In those cases, aesthetics should wait until the yard is physically stable.
Practical Budget Targets That Keep the Project Realistic
Most homeowners do better when they set a visible target instead of an abstract wish. A $150 cleanup and mulch refresh is a different project from a $1,500 front-yard overhaul, and the scope should match the budget. The mistake is trying to do both at once, which usually leads to half-finished work and extra trips to the store.
Use this rough framing: spend the smallest amount on removal and cleanup, the next amount on structure, and only then on decorative extras. If a project gets tight, cut decorative items first, not the structural ones. A clean edge and healthy plant bed matter more than a fancy ornament that does nothing for the layout.
Bottom line: the best low-cost yard improvements are the ones that simplify what the house already has. Pick a few repeated materials, choose plants that match the site, and finish the visible edges. Then let the yard look intentional instead of crowded.
What Should I Fix First in a Low-budget Front Yard?
Start with cleanup, edging, and anything blocking the house from view. Dead plants, overgrown shrubs, and unclear bed lines make a yard look neglected faster than a lack of expensive features. Once the space is tidy, add mulch or a few repeated plants so the yard reads as planned. That order gives the best visual return for the least money because it improves structure before decoration. In landscaping, structure is what makes a small budget look bigger than it is.
Is Mulch Really Worth It If I Am Trying to Save Money?
Yes, if you use it in the right places. Mulch suppresses weeds, helps soil hold moisture, and gives beds a uniform finish that looks more expensive than it is. It is not a fix for poor plant selection or bad drainage, though. If the bed floods or the plants are wrong for the light level, mulch only hides the problem for a short time. Think of it as a finishing layer, not the foundation of the project.
Which Plants Give the Best Value for a Low-cost Landscape?
The best value usually comes from native shrubs, hardy perennials, and ground covers that fit your climate. These plants tend to need less water and fewer replacements than trendy species that are not suited to the site. Repeating a few reliable choices often looks better than mixing too many varieties. The exact plants depend on sun, soil, and region, so the smartest move is to choose by growing conditions first and appearance second.
Can I Make a Yard Look Better Without Hiring a Landscaper?
Yes, if the work is cosmetic and the site is stable. Most homeowners can handle weeding, trimming, edging, mulch installation, container placement, and simple plant swaps. What usually causes trouble is trying to solve drainage, grading, or root problems without the right tools. A good rule is this: if the task changes the shape of the land or affects water flow, it is probably beyond basic DIY. Keep the do-it-yourself work visual and manageable.
How Do I Avoid Making a Cheap Landscape Look Cheap?
Use repetition, keep the color palette tight, and finish the edges carefully. Cheap-looking landscapes usually suffer from visual noise: too many plant types, mismatched materials, and no clear borders. A small set of repeated plants, one mulch type, and one or two accent elements often looks cleaner than a crowded design. The other mistake is skipping maintenance after installation. Even a modest landscape can look polished if it is trimmed, edged, and kept consistent over time.