
How to Insulate a Garage Door Without Blocking Its Tracks
How to insulate a garage door without blocking tracks: fitting insulation inside panels while avoiding interference with hardware, movement, and weight limits.
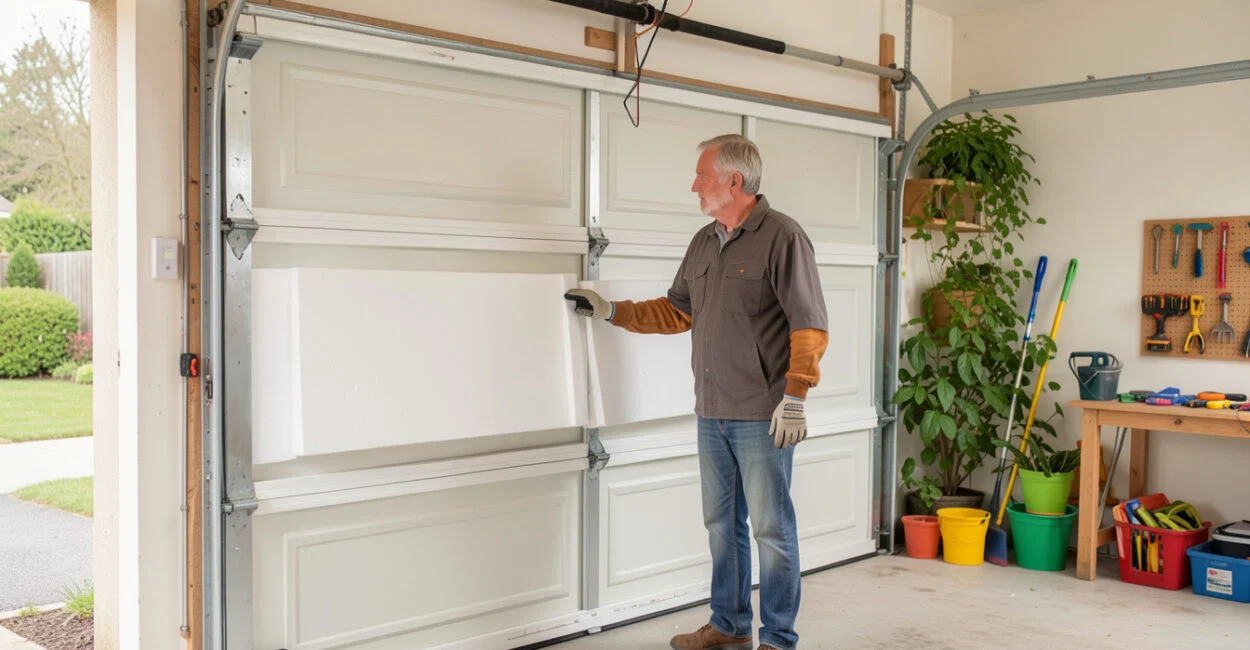 Fitting insulation while keeping tracks clear
A garage door can feel like the coldest wall in the house, yet packing insulation too close to its hardware can stop it from moving safely. Garage door insulation can reduce heat transfer through the door, provided the material fits inside the panels and stays clear of tracks, rollers, hinges, springs, and sensors. The right approach depends on the door’s construction and weight limits.
Before buying a kit, inspect how your door moves and what its manufacturer allows. A snug panel fit matters more than filling every gap, and insulating the door alone will not seal the rest of the garage.
Can Garage Door Insulation Be Installed Without Blocking the Tracks?
Yes. Fit insulation within the door’s panel cavities or approved frame, keeping it behind the door’s moving hardware and within the manufacturer’s thickness and weight limits. Tracks guide the rollers along the sides of the opening, so insulation should never overlap them or interfere with hinges, springs, cables, photo-eye sensors, or the door’s path.
Think of the door as a moving assembly, not a flat wall. A panel that looks clear while the door is closed may press against a track or hinge as it bends through the curved section overhead. Leave clearance around every moving part through the full opening cycle.
Check the Door Before Choosing a Material
Start by identifying the door type: sectional steel, wood, a single-piece tilt-up door, or another design. Sectional doors have hinged panels that travel along tracks; material that bridges those joints can bind as the door bends. A one-piece door moves differently, so a kit designed for sectional panels may not fit.
Look at the panel layout, too. Recessed panels often have a frame or lip that can hold a cut-to-fit insert. Measure the usable cavity, not the panel’s outside dimensions. If an insert protrudes beyond the panel face, it may catch on a hinge or the door frame.
Check for dents, loose hardware, rust, cracked panels, worn rollers, and frayed cables before adding weight. Existing insulation may be concealed inside the door, so consult the product label or manufacturer’s documentation rather than stacking another layer on top. Follow the door manufacturer’s installation instructions; construction and allowable added weight vary by model.
The International Door Association offers information about residential garage doors and their safe operation. For a door with damaged sections or uncertain construction, address that condition before choosing an insulation system.

Choose Insulation That Fits the Door
There is no single best material for every door. For recessed sectional panels, rigid foam board cut to fit can work well when the cavity depth, fastening method, and manufacturer’s guidance allow it. Reflective insulation depends on an adjacent air space to provide its intended performance, while a garage door insulation kit may include panel-specific retainers and instructions.
Option Best fit Watch for Rigid foam board Recessed panels with enough depth for a close-fitting insert Thickness, edge fit, added weight, and compatibility with the door’s finish Reflective insulation Door designs and installations that can maintain the air space specified by the product Reflective facing alone does not guarantee useful thermal performance; follow the product’s air-space instructions Garage door insulation kit Doors that match the kit’s stated panel layout and dimensions Check the kit’s materials, fastening method, added weight, and fit around hardware
For recessed panels, choose a rigid insert only if it sits within the recess without crossing panel joints or projecting into the path of hardware. A kit can simplify cutting and retention, but “universal” does not mean suitable for every door.
R-value describes resistance to heat flow through a material; it does not describe how airtight the whole garage door is. The U.S. Department of Energy’s Energy Saver guidance on insulation explains why insulation performance depends on the assembly and installation, not just a product’s label. Compare products only when their stated values use comparable test conditions.
Gather Tools and Materials for a Track-Safe Installation
Use the product manufacturer’s specified supplies. For a typical panel insert, the basic setup may include:
- Tape measure and straightedge
- Marker and a cutting tool appropriate for the chosen material
- Compatible retainers or adhesive, if the door and insulation instructions allow them
- Eye protection, gloves, and a stable work surface
Do not assume that construction adhesive, screws, or tape are suitable. An attachment that punctures a panel, releases in temperature changes, or interferes with a hinge can create a problem even when the insulation itself fits.
Install the Insulation Inside the Panels
Work with the door closed and secured against movement. If the door is damaged, difficult to operate, or has exposed spring or cable problems, stop and have it inspected rather than trying to hold it in place for a DIY installation.
- Measure each panel separately. Panel cavities can differ, and a small variation may matter where a hinge or retainer sits. Record the clear width and height inside the recess.
- Cut a test piece first. Trim one insert and check that it sits within the panel without bulging. A tight fit should not force the panel outward or bridge its joint.
- Fit and secure the material as directed. Use the kit’s retainers or an approved fastening method. Keep edges and fasteners away from hinges and any hardware mounted to the door.
- Check the full travel path. Open and close the door slowly while watching the inserts, joints, and hardware. Stop if material shifts, rubs, catches, or bows a panel.
A frequent mistake is cutting every piece to the panel’s outside dimensions. The cause is measuring the visible face instead of the recessed opening; the oversized insert then presses into hinges or protrudes as the sections curve overhead. Measure the cavity and test one piece before cutting the rest.
A safe panel insert stays within the door’s frame, follows each section as it bends, and adds no more weight than the door can carry.
Keep Tracks and Moving Parts Clear
Do not cover or modify tracks, rollers, hinges, springs, lift cables, or safety sensors. The tracks and rollers guide the door; hinges let sectional panels bend; springs counterbalance the door’s weight; and photo-eye sensors help detect an obstruction. Insulation belongs on the door panels only, in locations the manufacturer permits.
Keep the sensor lenses unobstructed and aligned. Do not route insulation, foil, or retainers across the beam or in front of either sensor. Never adjust torsion springs or cables to compensate for insulation weight. These parts are under high tension, and adjustment can cause serious injury.
Door insulation also cannot replace perimeter sealing. Worn bottom seals and damaged side or top weatherstripping can still admit drafts and water. The DOE’s Energy Saver information on air sealing distinguishes sealing air leaks from insulating surfaces. A properly fitted garage organization plan for a small family home can also help keep stored items away from the door’s travel path and sensors.
Check Balance, Set Expectations, and Know When to Call a Pro
Yes, added insulation can make a garage door too heavy or affect its balance, particularly if the door already has a damaged panel or worn hardware. Follow the manufacturer’s maximum added-weight guidance, if provided, and do not assume that a door’s existing springs can compensate for a heavier assembly.
After installation, test operation from the wall control while standing clear of the door. Watch for jerking, uneven travel, new scraping, a door that stops short, or an opener that strains or reverses. If any of these occur, stop using the door and arrange a professional inspection. Do not disconnect the opener or try to rebalance the door unless the manufacturer’s instructions specifically describe a safe procedure for your model.
Call a professional before installation if the door has broken or frayed cables, a visibly damaged spring, a bent track, a cracked panel, or an uncertain weight limit. A technician can assess whether the door can safely carry added material and whether its balance needs service. Insulation may make the door’s interior surface less exposed to outside temperatures, but it will not, by itself, make the garage warm or airtight. Results depend on the door, the rest of the garage envelope, and air leakage.
📱 See this content as a Web Story
Frequently Asked Questions
Can I Insulate a Garage Door That Already Has Insulation?
Check the door’s model information and inspect any accessible panel cavities before adding a layer. Extra material may exceed the door’s weight limit or prevent the panels from moving freely.
Will Reflective Insulation Work If It Touches the Door?
Its performance depends on the product design and the air space specified by its instructions. If the required gap cannot be maintained within the panel without interfering with hardware, choose another approved option.
Does a Higher R-Value Always Mean a Better Fit for My Door?
No. A higher labeled value does not make a material suitable if it is too thick, too heavy, or incompatible with the door’s panel design. Fit and manufacturer approval come first.
Should I Replace the Bottom Seal Before Insulating?
Inspect it for cracks, flattening, or gaps. A worn seal can let outside air and water pass beneath the door, so replacing a damaged seal may be a more direct fix for that leak than adding insulation to the panels.