
How to Safely Clean a Dryer Vent and Improve Airflow
How to safely clean a dryer vent: disconnect the appliance, remove lint from trap and duct, inspect the outside hood, and know when to call a professional fo…
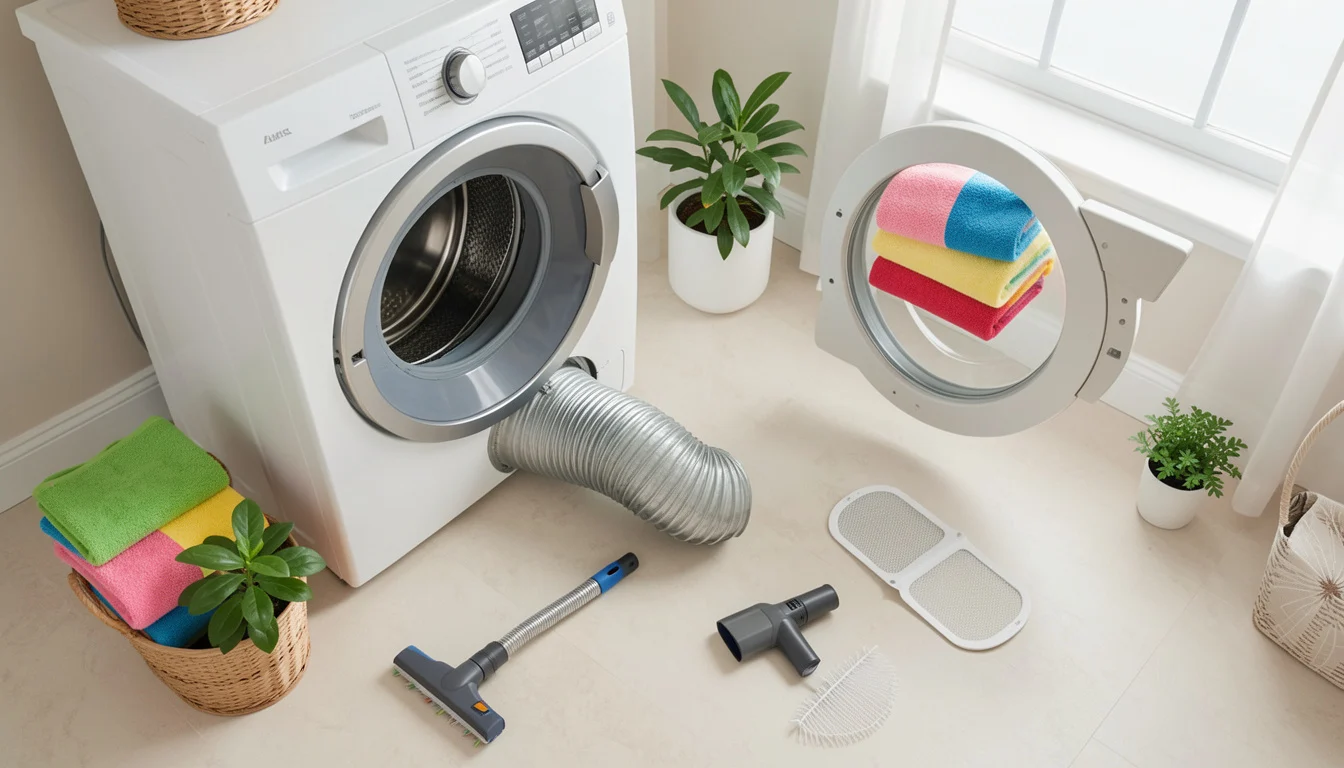 Cleaning a dryer vent for better airflow
A dryer that needs two cycles for a normal load may be signaling a restricted exhaust path, not a failing heating element. To clean a dryer vent safely, disconnect the appliance, remove lint from the lint-trap housing and duct, then check the outside hood for a clear opening and freely moving flap.
The vent is the duct that carries warm, moist air from the dryer to the outdoors. Lint can collect along that route, reducing airflow and adding a fire hazard; cleaning the lint screen after every load helps, but it does not clear the duct.
The safest approach depends on the duct’s length, material, and accessibility. A short, intact, reachable duct may be a reasonable DIY job. A long run, crushed connector, or blockage that resists gentle cleaning calls for a professional.
Why Cleaning a Dryer Vent Matters
Dryer vent cleaning removes lint and other debris from the exhaust duct so air can move from the appliance to the exterior termination. In everyday terms, the dryer needs an open path to push hot, damp air outside; a buildup in that path can make loads take longer and allow heat to accumulate.
The U.S. Fire Administration recommends cleaning lint from the dryer filter before or after each load and keeping the area around the dryer clear. Its dryer fire-safety guidance also supports routine attention to the appliance and its venting. Follow the dryer manufacturer’s installation and care instructions, since permitted duct materials and cleaning access vary by model.
A clean lint screen protects the dryer’s intake; a clear exhaust duct lets damp air leave the home.
Lint often gathers where airflow changes direction: behind the dryer, at elbows, and near the outside hood. A sharp bend or a long duct run can make accumulation harder to spot and harder to remove.
Signs Your Dryer Vent May Be Restricted
A restricted vent is more likely when drying takes longer than usual and several other airflow symptoms appear together. These clues are not a diagnosis: an overloaded drum, a clogged lint screen, a moisture-sensor issue, or a heating problem can also affect drying time.
- Clothes remain damp after a cycle that normally dries them.
- The dryer or laundry room feels unusually hot or humid during operation.
- The outside exhaust flap barely moves, or little air comes out while the dryer runs.
- You notice a musty smell, visible lint around the exterior hood, or lint behind the appliance.
- The dryer stops mid-cycle or displays an airflow-related warning, if the model has one.
Start with the lint screen and the load size, then check the outdoor termination while the dryer is running only if the vent is fully connected and the area is safe to access. If airflow remains weak after routine cleaning, the obstruction may be deeper in the duct or the cause may be elsewhere in the appliance.

What to Gather Before You Start
Choose dryer vent cleaning tools that match the duct, not just the job. A brush or flexible rod that is safe for rigid metal may tear a thin foil connector, loosen a joint, or become stuck in a long run.
Tool Best for Limit or risk Soft dryer vent cleaning brush Lint near an accessible opening or short, straight duct Can snag or damage fragile, crushed, or foil ducting if forced Vacuum with a narrow hose attachment Loose lint in the lint-trap housing and at reachable duct ends May not reach bends or remove compacted buildup farther inside Dryer vent cleaning kit with flexible rods Longer, straight, sound duct runs when used according to the kit instructions Rods can separate, kink, or damage ducting if overextended or pushed hard
Gather a vacuum, a flashlight, work gloves, and the appropriate brush or kit. Check the manufacturer’s instructions for the dryer and the cleaning-tool maker’s directions. Do not use a leaf blower, a high-pressure hose, or a rotating drill attachment unless the duct and tool manufacturers specifically permit that method.
Plan where the tools will live before beginning: a small, labeled spot for household maintenance supplies can prevent loose attachments from getting misplaced. For storage ideas, see these approaches to fitting more on closet shelves, low-cost DIY closet shelves, or a quick garage reset.
How to Clean the Dryer Vent Step by Step
Yes, you can clean a dryer vent yourself when the duct is accessible, intact, and within the reach of suitable tools. Stop if the duct is damaged, the route is difficult to reach, or a brush meets firm resistance; forcing the tool can turn a blockage into a repair.
- Prepare the area. Empty the dryer and clear space around it. Read the appliance instructions, especially if the dryer is gas-powered or built into cabinetry.
- Disconnect power. Unplug an electric dryer. For a gas dryer, follow the manufacturer’s shutdown instructions; if accessing the connection would require moving or disturbing the gas line, leave that work to a qualified technician.
- Move the dryer carefully. Avoid pulling on the power cord or vent. If the appliance is too heavy or the connection is inaccessible, do not force it forward.
- Detach and inspect the duct. Loosen the clamp or fastener at the dryer outlet and check the connector for crushing, holes, and loose joints. Replace damaged or unsuitable ducting with material allowed by the dryer manufacturer and local requirements.
- Clean the lint-trap housing. Remove the lint screen and vacuum loose debris from the opening with a narrow attachment. A long brush made for this purpose can reach farther, but use gentle strokes so it does not damage the housing or push a clump deeper.
- Clean the duct. With the duct detached, vacuum reachable loose lint. If using a dryer vent brush or kit, follow its instructions, work in manageable sections, and withdraw the tool carefully. Do not spin or force a brush through a bend or a fragile connector.
- Reassemble and reconnect. Reattach the duct securely, check that it is not crushed behind the dryer, and restore power according to the appliance instructions. Never run the dryer with the exhaust duct disconnected.
A common DIY mistake is pushing a brush through the duct without first checking what it is made of. Thin or damaged connectors can tear, while rods can come apart inside a long run; inspect the material and route before choosing a tool, and stop at resistance rather than applying more force.

Cleaning the Exterior Vent and Checking Airflow
Cleaning from inside is usually best for the lint-trap housing and the duct connection behind the dryer; cleaning from outside helps clear the termination and spot a stuck flap. For many homes, checking both ends gives a more complete inspection, but access and duct layout determine which approach is practical.
With the dryer off, inspect the outdoor hood for lint, leaves, nests, and a stuck or damaged flap. Remove loose debris without pushing it into the duct. Keep the exhaust opening clear of screens or covers that the dryer manufacturer does not allow, because added restrictions can impede airflow.
After reconnecting the duct, run the dryer according to its instructions and check from a safe position outside. The flap should open freely, and you should feel exhaust leaving the vent. This is a basic check, not a precise airflow measurement; a weak or inconsistent discharge after cleaning can point to a hidden blockage, a duct-design problem, or an appliance fault.
When a cleaning tool meets firm resistance, the safest next step is to find the cause, not to push harder.
When to Call a Professional
Call a qualified dryer-vent professional when the duct is long, inaccessible, damaged, or still blocked after careful cleaning. The same applies when the route runs through a wall or ceiling, the outside termination cannot be reached safely, or a brush or vacuum cannot reach the obstruction without force.
The U.S. Consumer Product Safety Commission also offers dryer safety recommendations. If you suspect a damaged gas connection, smell gas, or see scorching, stop using the dryer and follow the appropriate safety guidance rather than continuing maintenance.
Dryer vent cleaning cost depends on factors such as duct length, number of bends, access, the amount of buildup, and whether repairs or replacement are needed. Ask what the service includes: a useful quote should make clear whether it covers the full duct, the exterior termination, and any additional work. Cleaning may not solve long drying times if the cause is a faulty sensor, heating component, overloaded drum, or an installation that does not meet the dryer’s requirements.
Keep the Vent Clear with a Maintenance Routine
How often to clean a dryer vent depends on laundry volume, duct length and layout, dryer instructions, and what you find during inspections. Clean the lint screen after every load, check the outdoor flap periodically, and schedule duct cleaning based on use and warning signs rather than assuming one interval fits every home.
Homes with frequent laundry, pets, or a long duct with several bends may need more frequent attention than homes with a short, straight run. If drying time changes or the outside airflow weakens, inspect the system sooner. Keep the space behind the dryer clear enough to prevent the connector from being crushed when the appliance is pushed back.
For the next step, check the dryer manual for approved vent materials and service guidance, then inspect the duct route and exterior hood. If the duct is short and sound, use a suitable kit carefully; if it is hard to reach or remains restricted, arrange a professional inspection.
📱 See this content as a Web Story
Frequently Asked Questions
Can Dryer Sheets Cause Vent Buildup?
They can leave residue on the lint screen over time, which may reduce airflow through the screen. Wash the screen with water and a soft brush if the manufacturer’s care instructions allow it, then let it dry fully before reinstalling.
Should I Clean the Lint Screen Housing as Well as the Screen?
Yes. Lint can collect below the removable screen, so vacuum the reachable housing carefully with the dryer off and disconnected from power.
Can I Use a Leaf Blower to Clear the Duct?
A leaf blower can force lint into bends or push duct joints apart, and it may not remove compacted debris. Use a tool designed for dryer ducts or hire a professional if the route is not safely reachable.
Is Foil Duct Always Unsafe?
Not every product called “foil duct” is the same, but thin, flexible transition duct can crush or tear easily. Use only the duct type and length allowed by the dryer manufacturer and applicable local requirements; replace damaged material rather than patching it as a permanent fix.
Should I Clean a New Dryer Vent Before Using the Dryer?
Inspect the duct and outside hood, particularly if the home has been renovated or the vent was unused. If you find construction debris, a nest, or a blockage, clear it before operating the dryer.
Why is the Dryer Still Slow After the Vent is Clean?
Check load size, cycle selection, and the lint screen first. Persistent slow drying can also come from a heating or sensor problem, or from duct length and installation conditions that restrict airflow, so the appliance may need service even after the duct is clear.